If the primary link fails in the previous example, our M!DGE has to dial up the mobile connection and reestablish the VPN tunnel which can take more time than your application can handle. With Mobile IP and permanent backup link availability, we can shorten this time to several seconds…
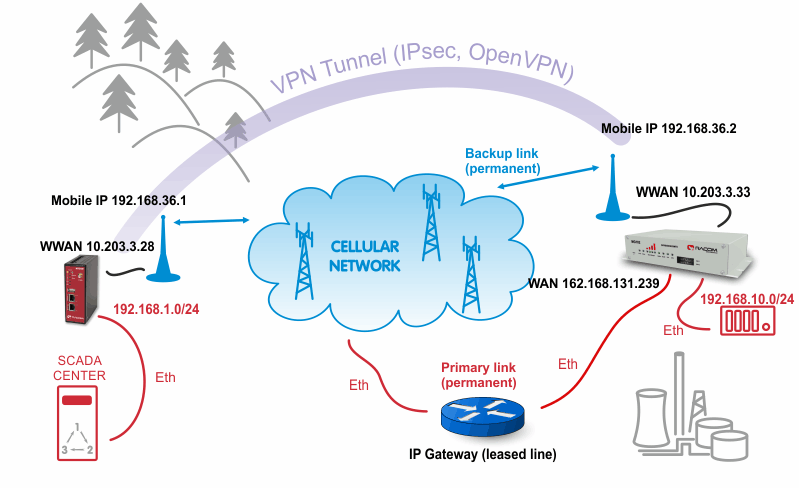
The diagram depicts an example in which the M!DGE unit is the VPN and MobileIP server. The server has just one connection option and it needs to communicate with the device behind the remote MG102i unit.
The remote MG102i unit has two possible connection types. The primary link is via faster leased line to the provider’s network and the cellular connection is the backup option. Both will be “up” permanently.
| Note | |
|---|---|
The remote connection types can be various, e.g. using WLAN or dualSIM unit with two cellular providers. |
On both units, we configure the Mobile IP feature so the VPN tunnel can resist switching the links.
On the central M!DGE unit, we need to configure Ethernet IP addresses, mobile connection, VPN tunnel, correct time and of course Mobile IP.
The Ethernet IP address of the server is 192.168.1.1 with 255.255.255.0 mask.
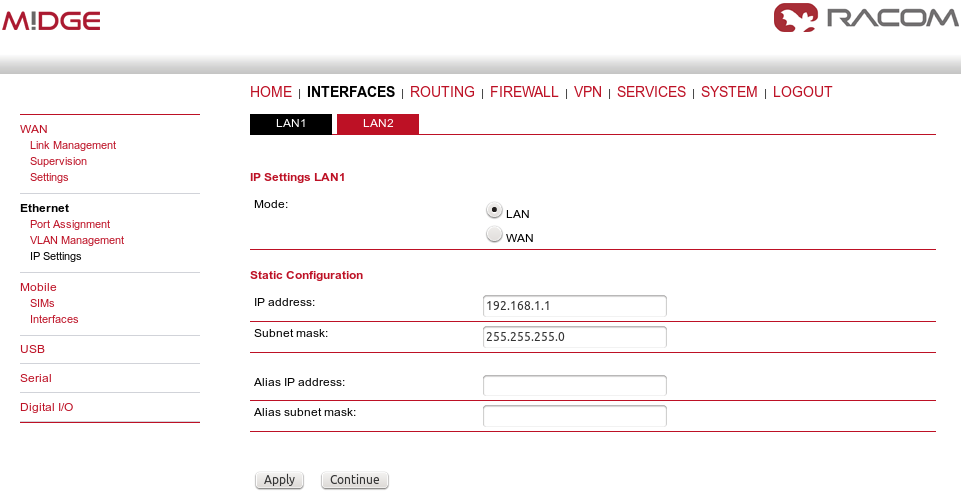
The server is utilizing only the first port so you do not need change the LAN2 IP address. Another step is to define the mobile connection. Configure the SIM card, APN and username/password in the INTERFACES – Mobile menu and check whether it is enabled afterwards.
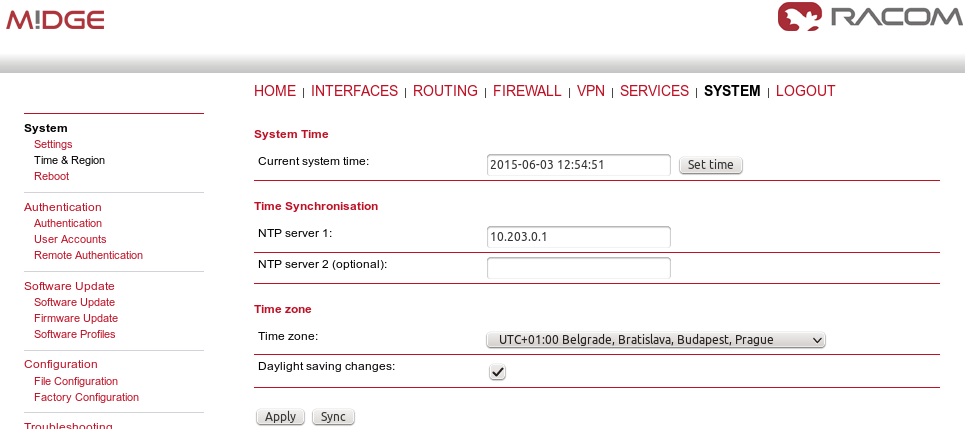
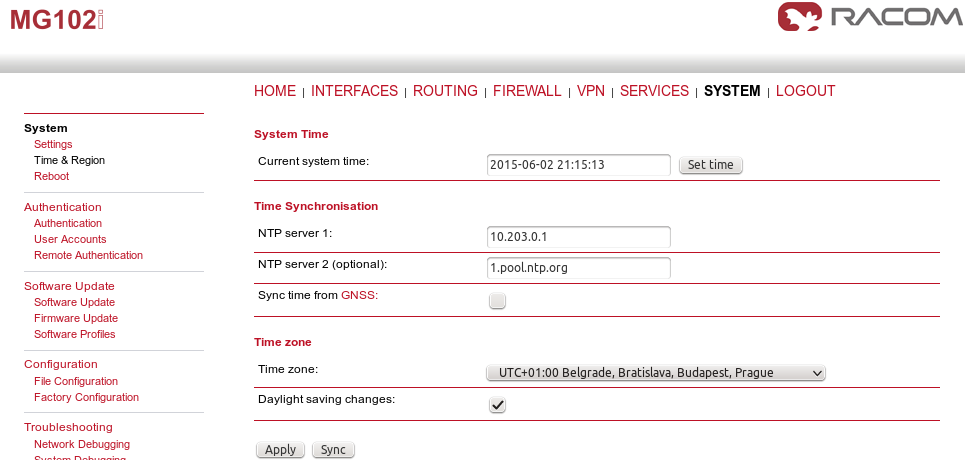
In case you will use OpenVPN tunnel, it’s necessary to have a correct time in the unit. This can be achieved by setting the NTP server to synchronize the internal time. Go to the SYSTEM – Time & Region menu and fill in the reachable NTP server of your choice. Also set the correct time zone and Daylight saving option.
| Note | |
|---|---|
If using IPsec tunnel, it is not necessary to have a correct time our routers, but it is still useful for troubleshooting. |
Now we need to configure the MobileIP functionality. With Mobile IP, the client (mobile node) can be connected to the network anywhere and if the server’s (home agent) cellular IP address is reachable from the client, you can always communicate via new pair of IP addresses. See the details in the example.
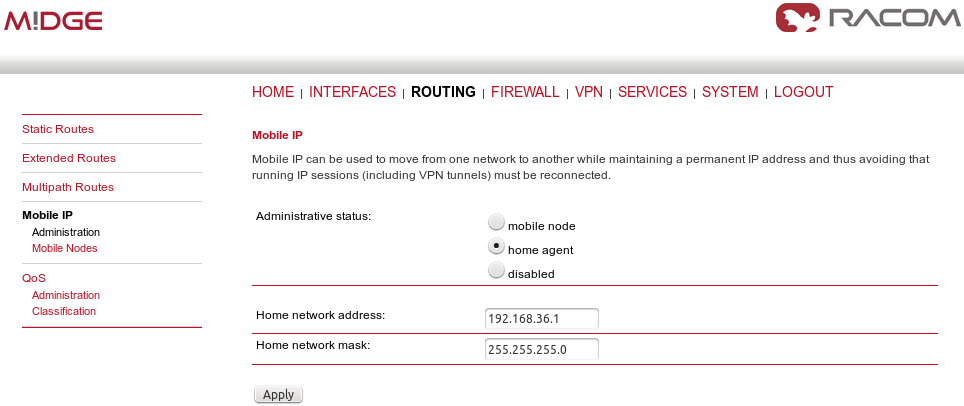
The configuration itself is very easy. Just choose the “home agent” status and fill in the agent’s IP address and mask – in our example it is 192.168.36.1/24.
The Mobile IP is automatically enabled afterwards.
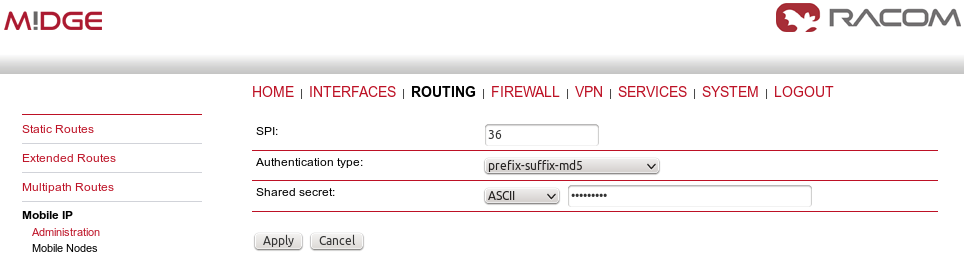
Another step is to configure the clients (mobile nodes). For each client, define a specific SPI (36 in our example), authentication type (prefix-suffix-md5) and shared secret (ASCII password).
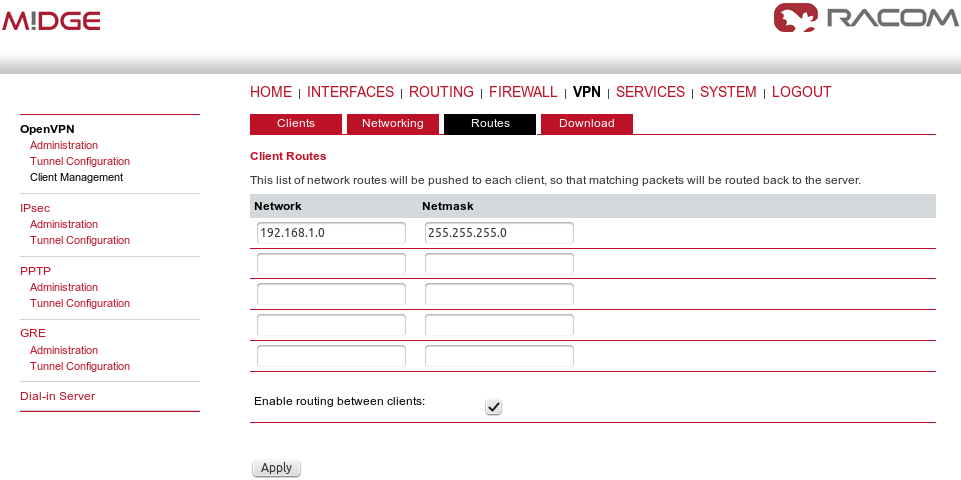
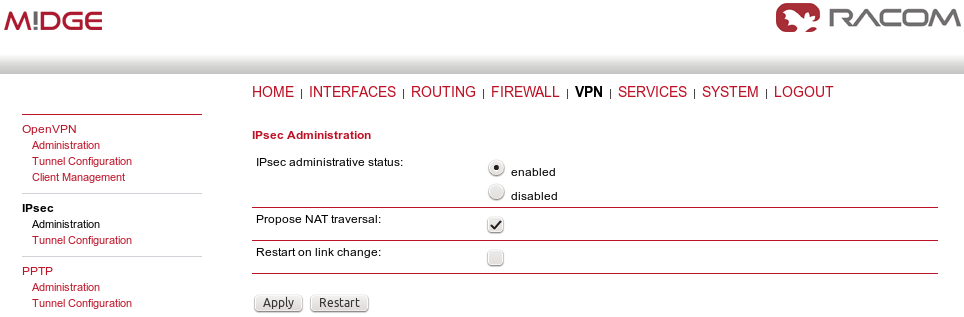
The last step is to configure the VPN tunnel. It can either be OpenVPN or IPsec, the functionality is the same in this example.
Configure the OpenVPN server in routed mode.

Configure one client (MG102i). Configure the correct IP subnets.
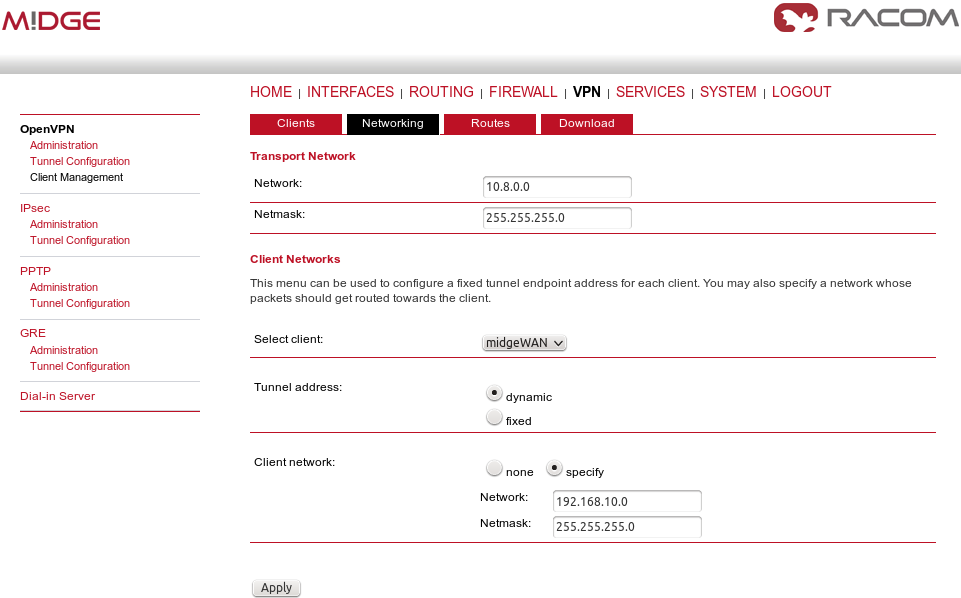
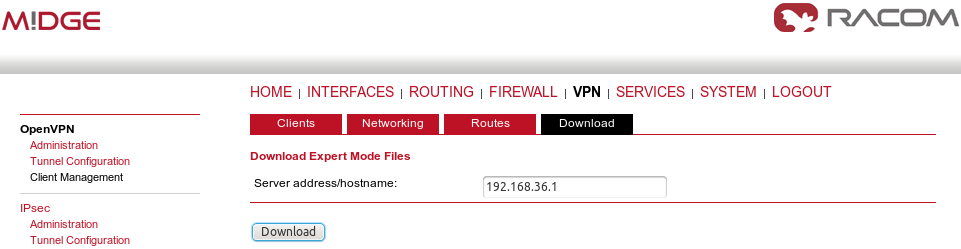
The only difference to the basic VPN configuration is when downloading the Expert file for the client. You must configure the Mobile IP address (192.168.36.1 in our example) so the remote unit connects via Mobile IP network.
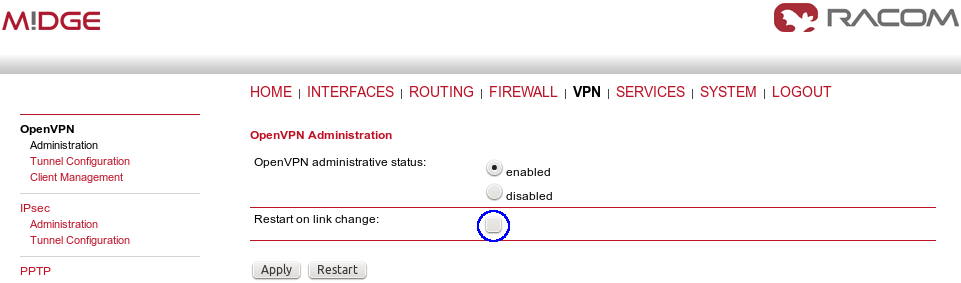
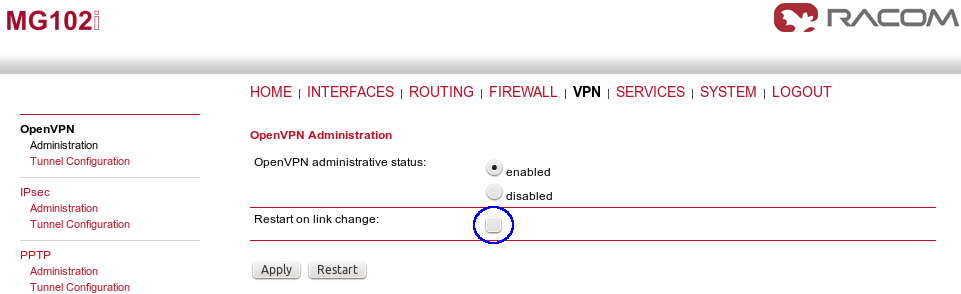
Enable OpenVPN server and uncheck the box for “Restart on link change”. This is very important step, do not forget to uncheck this box. If the box is checked, everytime any link changes the status, the tunnel is restarted and we do not want this. This is mainly important on the client’s side.
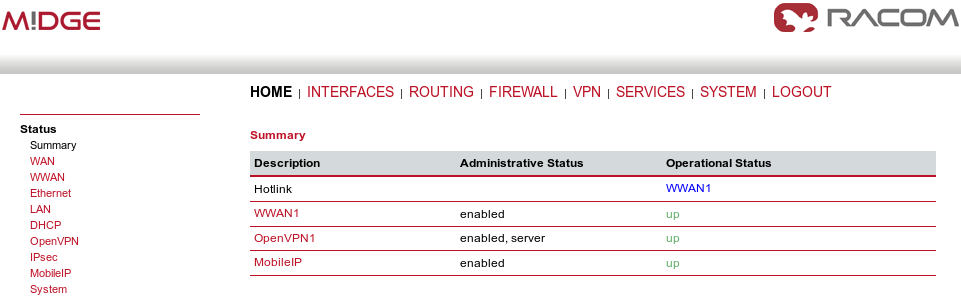
When we finish all configuration steps, we should see the following state in the HOME menu.
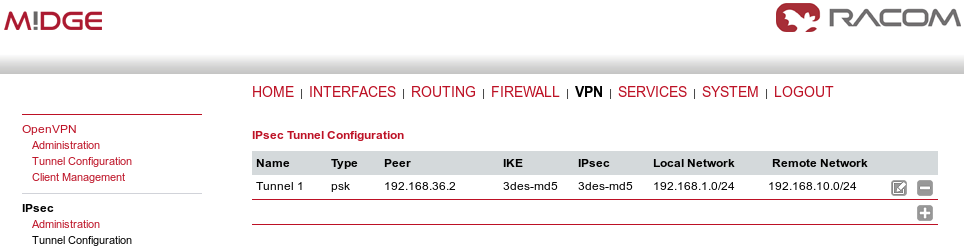
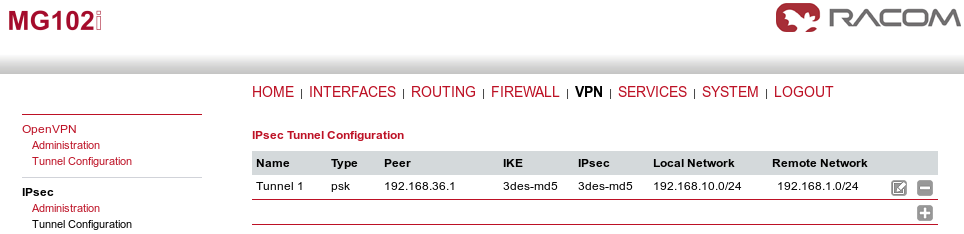
If you want to use IPsec, the situation is very similar. Just configure the correct IP subnets, set Peer IP address to the Mobile IP address (192.168.36.2) and uncheck the “Restart on link change” box as with OpenVPN.
The client’s configuration is more complex due to two connectivity options. The unit needs to be connected to both options simultaneously (permanently).
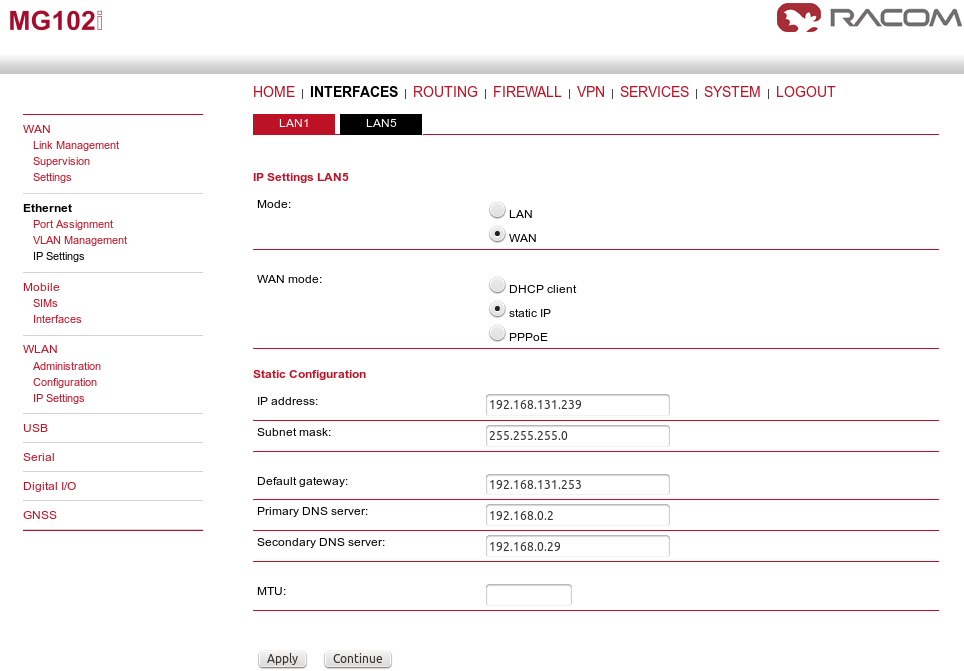
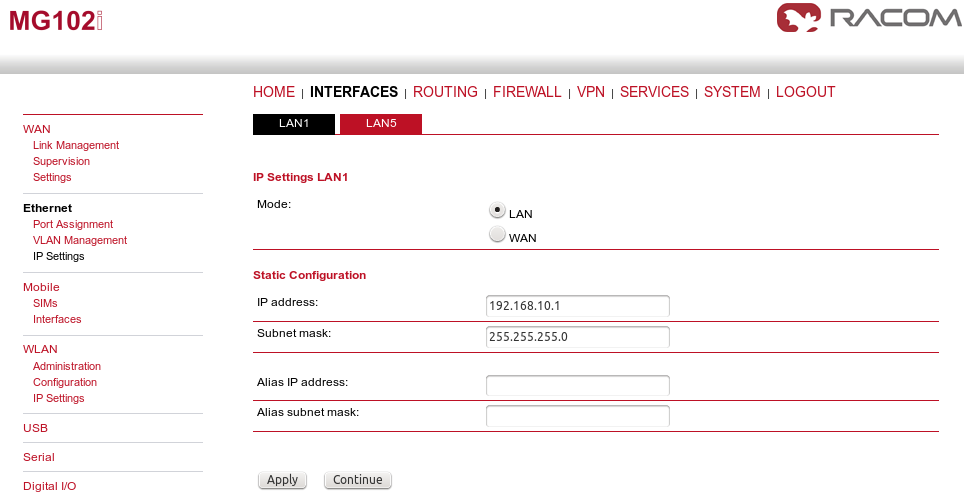
The LAN5 interface is configured as the primary WAN link. LAN1 subnet should be set to 192.168.10.1/24.
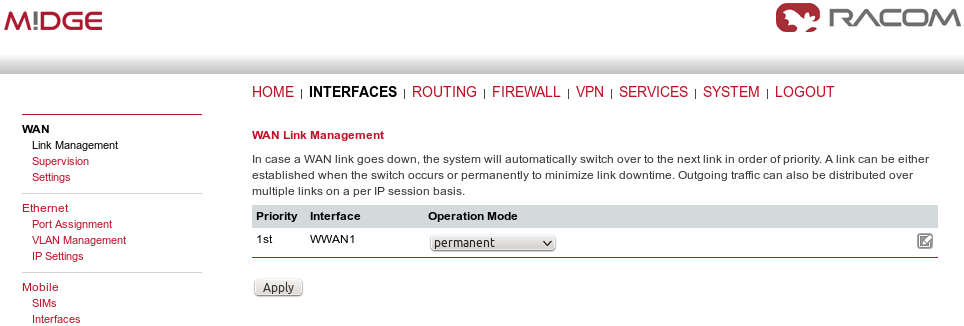
Configure the mobile connection and set both links to be permanently “up”.
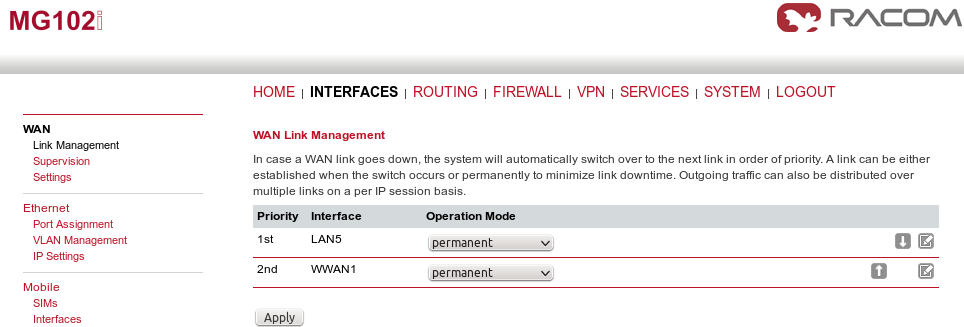
We need to recognize that LAN5 is not available for us and switch to WWAN interface. This is recognized if the Ethernet cable is disconnected, but with Supervision feature, we can check the IP host reachability with ping probes and if this host is not reachable, switch to the backup profile.
In our example, we configure this for each link separately.
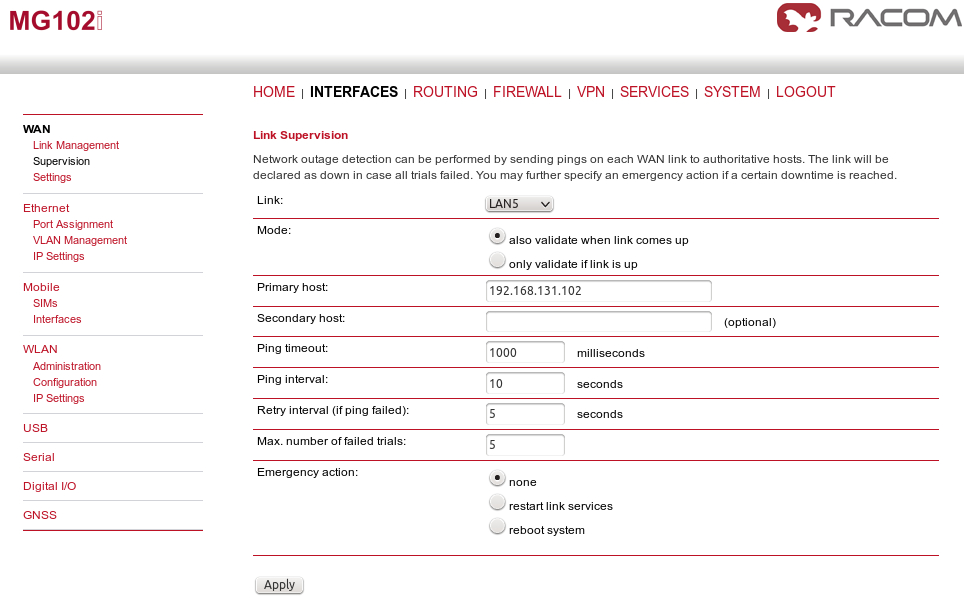
The primary link is checked every 10 seconds by pinging the 192.168.131.102 host. If the ping is lost 5 times, the link is considered down and the mechanism switches to the WWAN option.
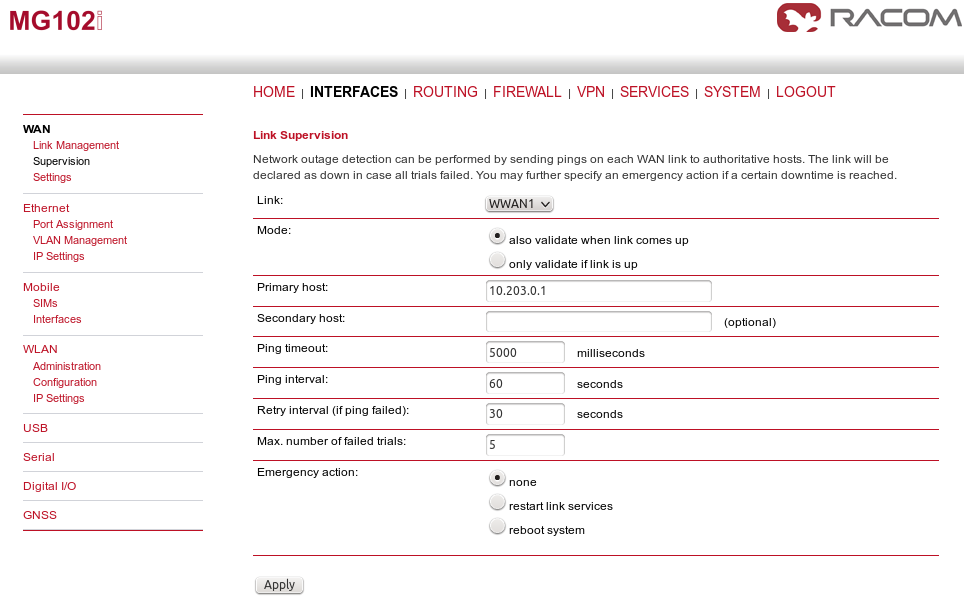
The WWAN1 interface is also checked, but we increased the ping timeout (mobile latency can be high) and we check the reachability (of IP 10.203.0.1) less frequently.
| Note | |
|---|---|
In this example, if we switch off the host 192.168.131.102, the Supervision feature will switch the active link to WWAN. It is good to have a similar option for your own testing. |
Configure the NTP server in the SYSTEM – Time & Region menu so we have the correct time.
Our MG102i unit needs to be configured as a mobile node for the Mobile IP functionality. Go to the Routing – Mobile IP menu.
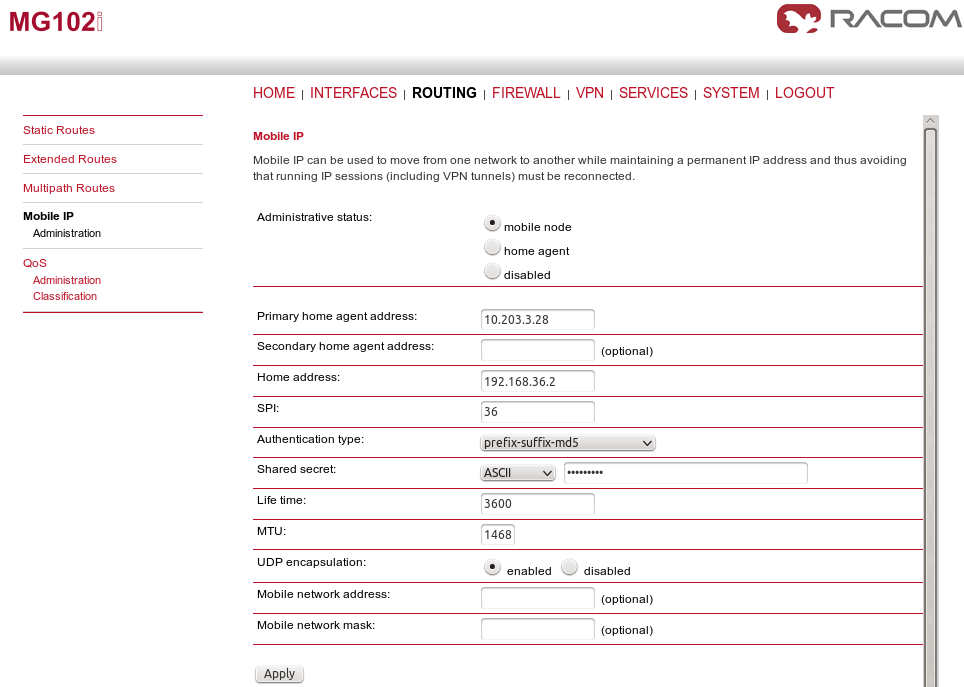
Set the Primary home agent address to the cellular IP address of the M!DGE (server) unit, 10.203.3.28 in our example. The home address must fall into the 192.168.36.0/24 subnet. Set the correct SPI which was configured on the server and fill in the correct secret. Keep the rest in the defaults.
Another step is to define the server’s Mobile IP address (192.168.36.1/32 via MobileIP1 interface) in the Routing menu.
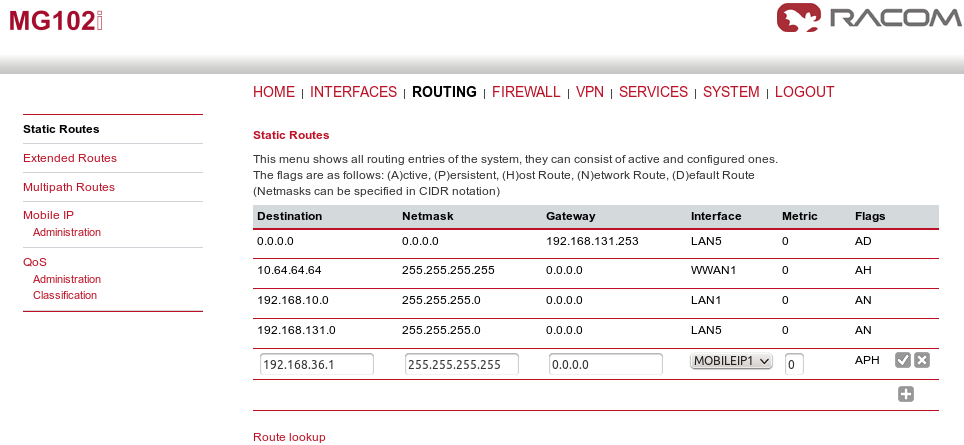
Without this option, MG102i unit would not know the server’s Mobile IP address which is essential for the proper functionality of Mobile IP.
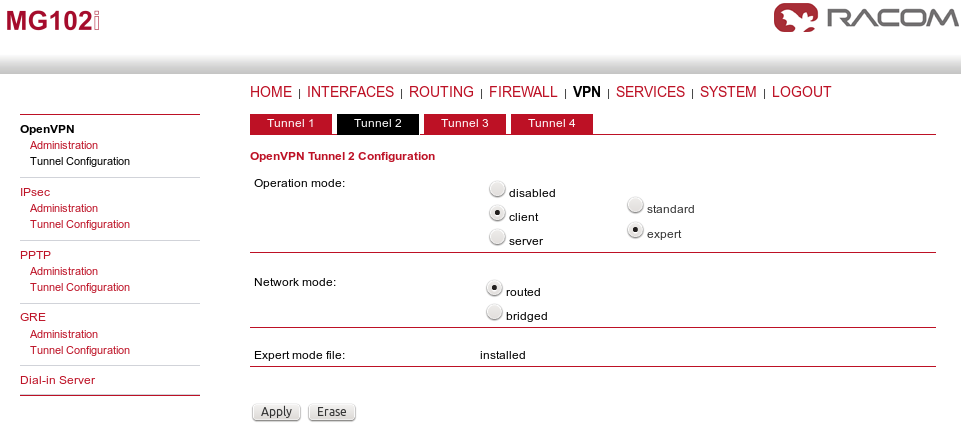
MG102i is a client in the OpenVPN configuration so just upload the Expert file and set the mode to “Routed”.
Enable the tunnel and uncheck the “Restart on link change”. This is essential for fast switching of active link, do not forget to uncheck this option.
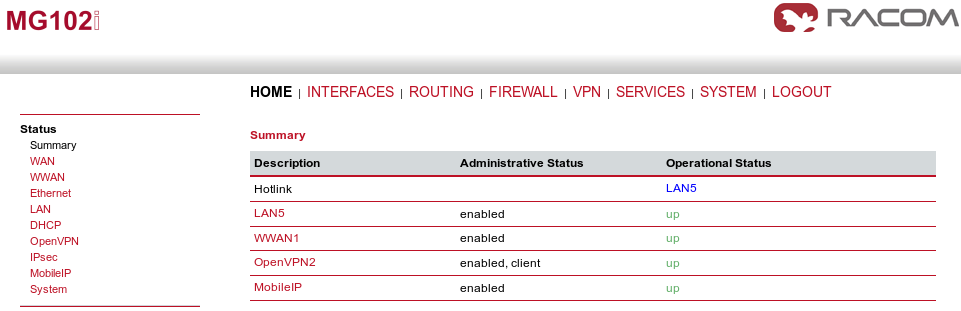
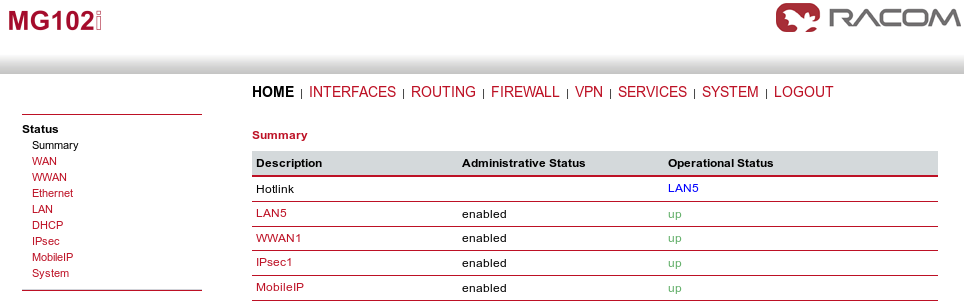
The tunnel should be established quickly and the HOME menu should be similar to the following example.
If you choose IPsec, configure the tunnel as on the server (credentials, IDs switched, networks switched, …) and set the Peer IP to 192.168.36.1 (Mobile IP address of M!DGE unit).
Enable the tunnel and uncheck the “Restart on link change” box again.
If configured correctly, check the HOME menu.
After all required configuration steps are done, the reachability of devices in the M!DGE and MG102i subnets should be achieved. The encrypted data should pass through the LAN5 (WAN) interface on MG102i unit. If you do not have any attached devices, you can check the reachability from the CLI menu of either M!DGE or MG102i.
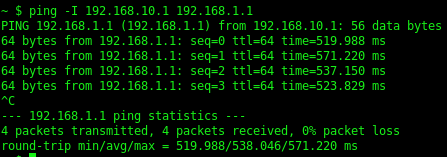
If you are using Windows to access the unit, run Putty for accessing the unit via SSH. Set the user to “root” and use the same password as for the admin account for the web interface. Running the command “ping” must be defined with “-I” parameter so the source address would fall into the VPN routed subnet.
To force the link of MG102i to switch to backup option, you can either unplug the Ethernet cable or switch off the host set in the Supervision menu. The result will be that the WWAN interface will be used.

During the switchover, run the ping command continuously from the Server to the Client (pinging 192.168.10.1 IP address with a source address within 192.168.1.0/24 subnet). You will see that several packets are lost, but the time needed for the switchover is within seconds. You can compare it without using Mobile IP functionality.
You can also run your target application and see what happens during switching the links.
| Note | |
|---|---|
Using the web interface’s Network debugging tool would not work, because the source IP address/interface cannot be set and the reply would not be forwarded to the VPN tunnel. |
See the manual for more details.