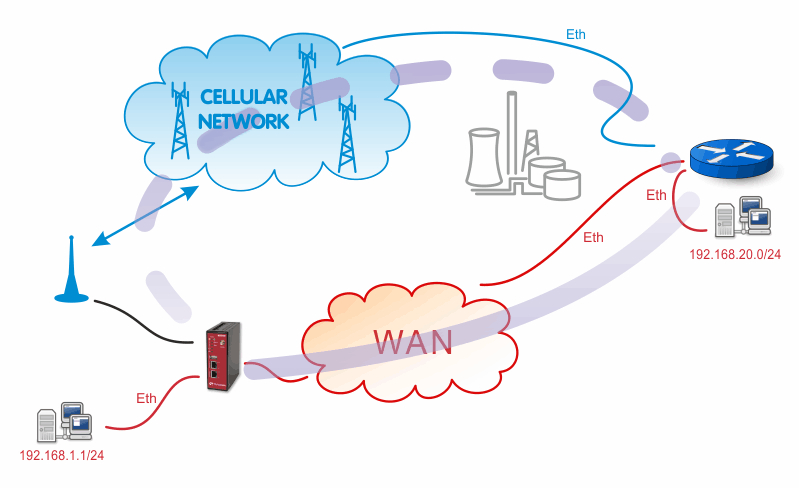
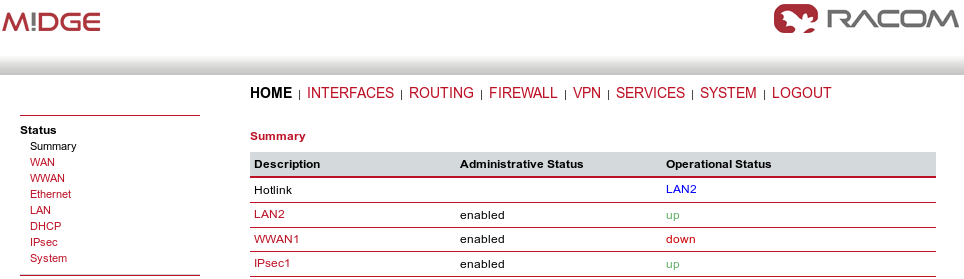
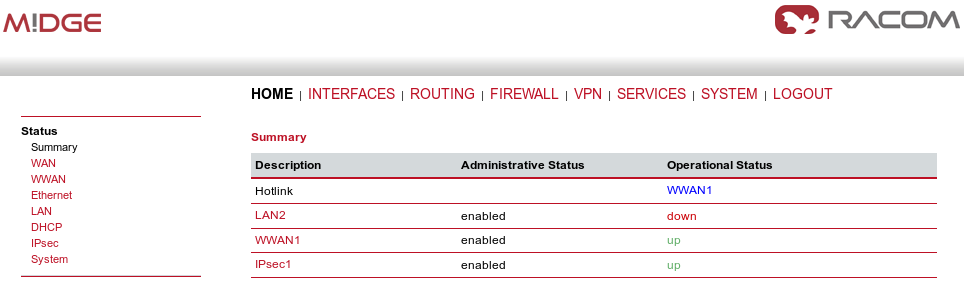
M!DGE is connected via the WAN network using its LAN2 interface. The WWAN1 link (cellular network) is down and the IPsec VPN connection is already established. To achieve this, several steps must be performed.
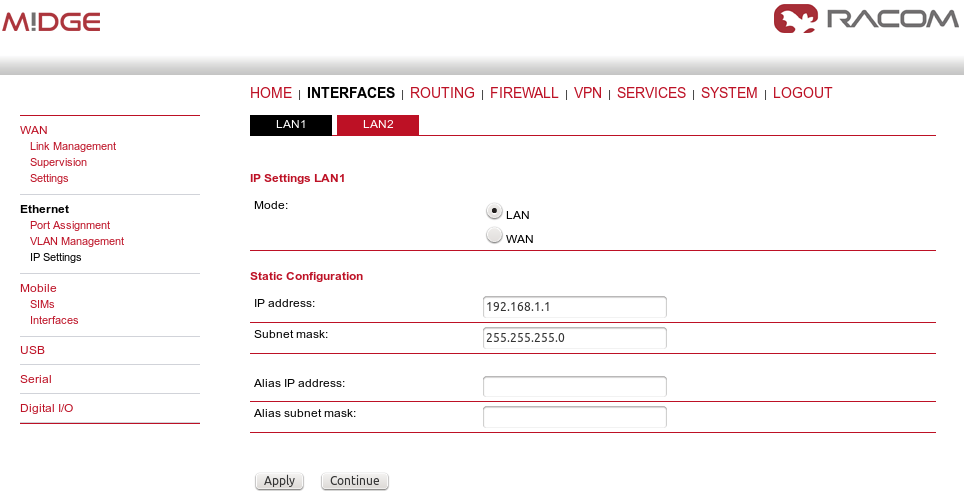
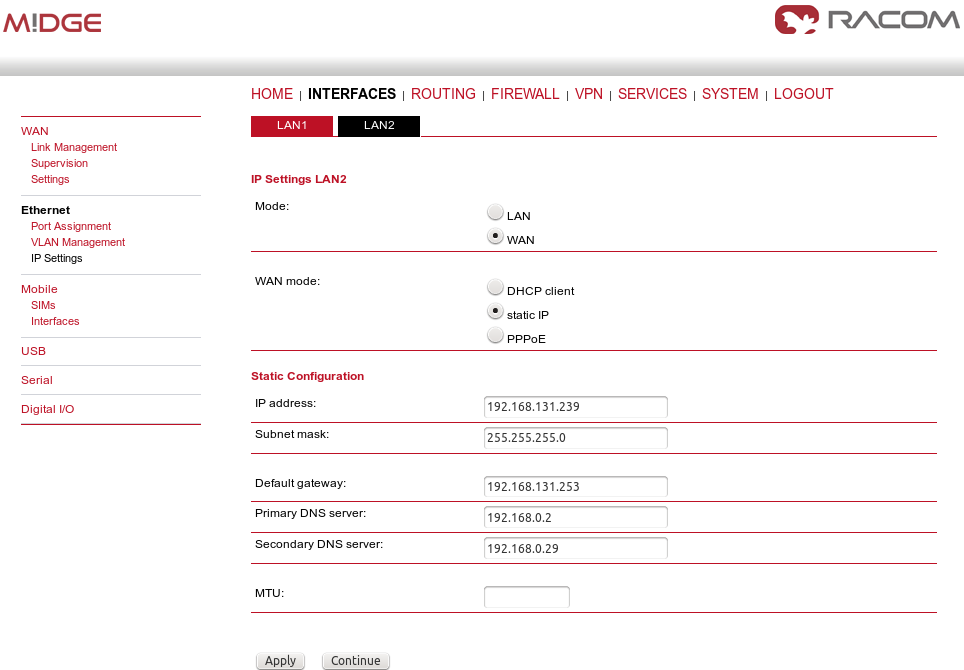
In the example, the first port (LAN1) is used for the local subnet 192.168.1.0/24 and the WAN port (LAN2) is configured with an IP address 192.168.131.239/24. See the following pictures for the details.
For the backup link, you need to configure your SIM card and APN accordingly. The configuration is made in the INTERFACES – Mobile menu. Configure it to meet your APN configuration.
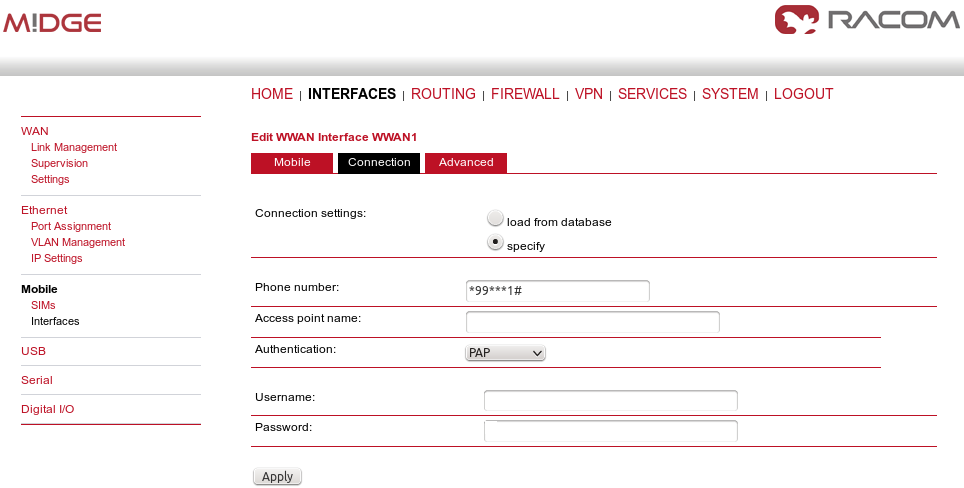
Use manual for more details about the mobile interface configuration.
Configure and enable the IPsec (or OpenVPN) tunnel to the remote peer. In the example, the local network is 192.168.1.0/24 and remote network is 192.168.20.0/24.
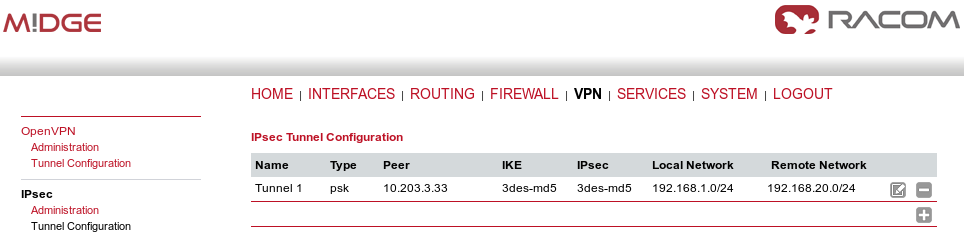
Keep in mind that you need to configure Peer IP address to be reachable via both connections (WAN and WWAN) so it may establish IPsec connection.
See the VPN examples in VPN Configuration application note or the manual for more details.
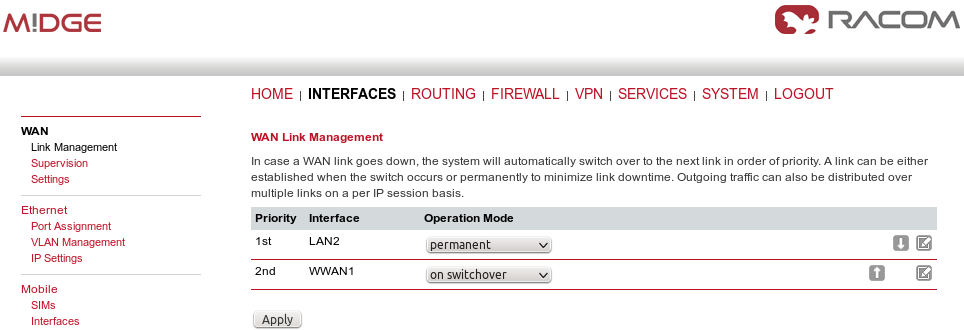
In the Link Management menu, configure the LAN2 interface as the permanent and primary option. Set the WWAN interface as its backup. The Establishment mode can be either set to „on switchover“ (to be connected only when the permanent link is not active) or „permanent“ (to be connected all the time – it is used for the faster link switching).
Another step is configuring the Supervision feature.
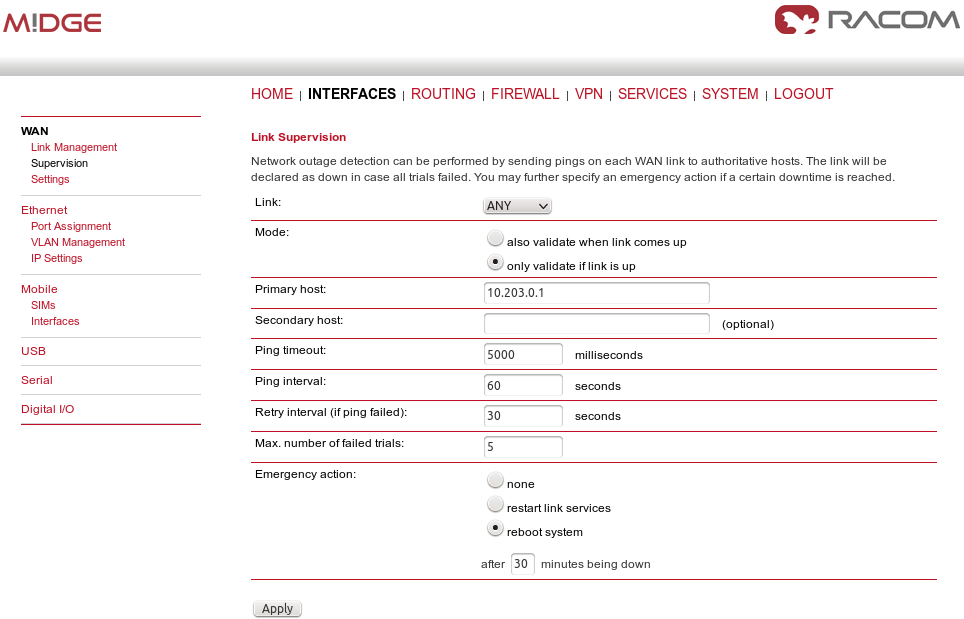
The Supervision enables M!DGE to control the link switching procedure. In our example, M!DGE checks the connection by executing the ping packets to the host on the IP address 10.203.0.1. If five consecutive ping packets are unsuccessful, the link is considered down and is switched. If there is no connectivity for 30 minutes, the unit is rebooted as a result of the Emergency action.
Both links are checked when they are up (Link – ANY), otherwise you could choose just one link to be checked or create two different Supervision for each link (e.g. lower timeouts and more frequent checks on the WAN link).
Now you should be connected via the primary WAN link (LAN2). The easiest way to test the switching is to unplug the ETH cable from the LAN2 interface. M!DGE almost immediately recognizes the unplugged cable and it switches to the cellular network. The VPN tunnel should also be reestablished.
| Note | |
|---|---|
You can test the connectivity by issuing a ping to any desired IP address (e.g. behind the VPN tunnel) in the SYSTEM – Troubleshooting – Network debugging menu. |
Plug the cable back into the LAN2 interface and wait a moment for the M!DGE to reestablish the primary connection again.
You can also check the correct functioning of the Supervision feature.
Fill in both host IP addresses in the Supervision menu. One needs to be reachable only via the cellular network and the other one only via the WAN network. Turn off the server with an IP address reachable via the WAN network. The active connection should be changed to the cellular network. Turn on the server again and see the link switch back to the primary one.