M!DGE3 can be easily managed from your computer using a web browser. If there is an IP connection between the computer and the respective M!DGE3, you can simply enter the IP address of any M!DGE3 in the network directly in the browser address line and log in. However, it is not recommended to manage an over-the-air connected M!DGE3 in this way, because high amounts of data would have to be transferred over the Cellular channel.
System fonts are utilized to accelerate the loading of web pages. This functionality was introduced in FW 2.2.5.0. As system fonts are dependent on the operating system, the screenshots featured in this manual were captured on a Microsoft Windows OS.
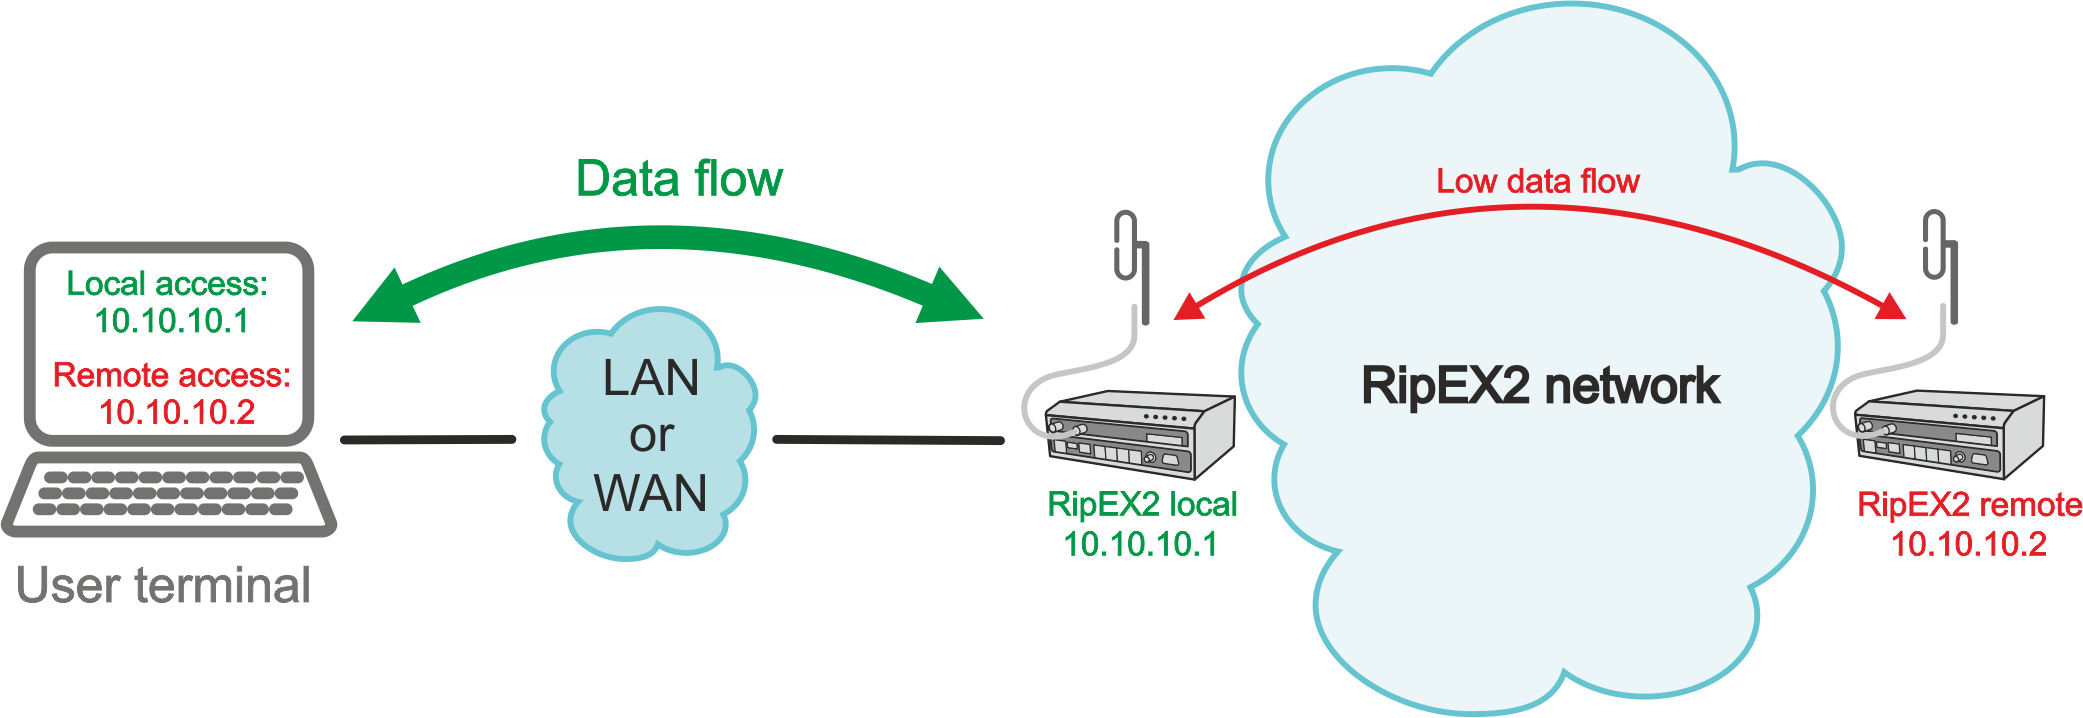
When you need to manage an over-the-air connected M!DGE3 (recommended), log-in to a M!DGE3, which your computer is connected to using either a cable (via LAN) or a high-speed WAN. The M!DGE3 which you are logged-in to in this way is called Local. Then you can manage any remote M!DGE3 in the network over-the-air in a throughput-saving way: all the static data (e.g. Web page graphic objects) is downloaded from the Local M!DGE3 and only information specific to the remote unit is transferred over the Cellular channel. M!DGE3 accessed in such a way is called Remote.
You can also connect to M!DGE3 unit to the hybrid networks in a same way.
For the sake of security only HTTPS protocol is used for the connection between the web browser and M!DGE3 unit. If the http://… is used into the web browser address line, the communication is immediately automatically redirected to HTTPS protocol.
For better protection against unauthorized access to the network there is a timer build within the M!DGE3 unit and the web interface (set to 24 hours by default), which is monitoring user activity. In case of user inactivity, the connection between the web interface and the unit will be interrupted (i.e. automatic logout). Timer is automatically launched in parallel both In the unit and in the web browser. In case of changing the timer setting, we recommend to logout and login, so the correct initialization of timeout inactivity can occur.
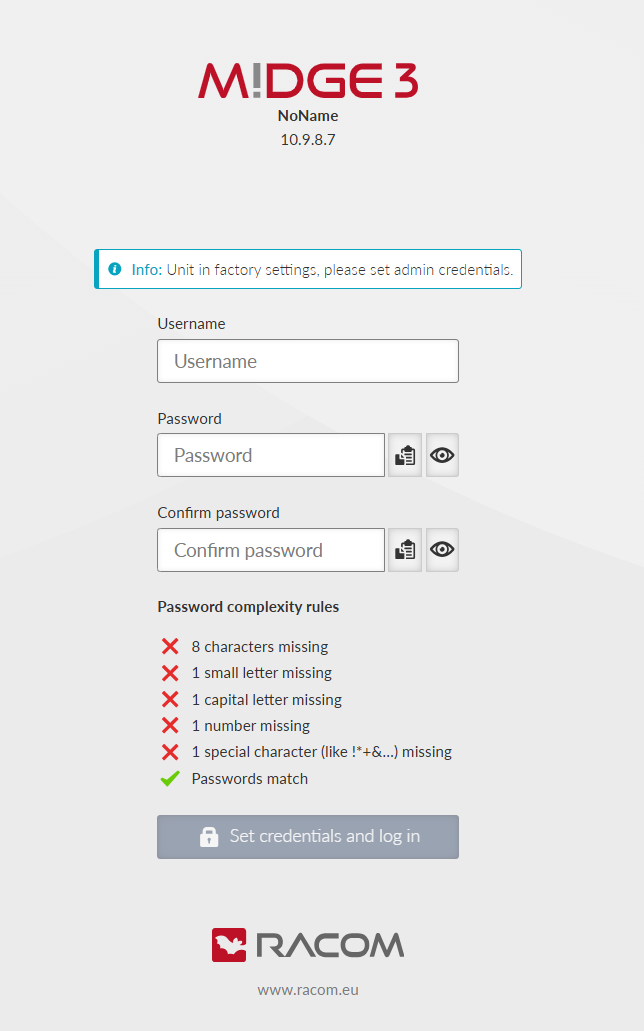
- First time login page
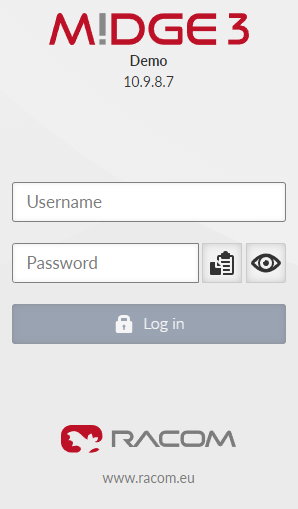
- Login page
![[Note]](/images/radost/images/icons/note.png)
Note Web interface for M!DGE3 is identical to RipEX2.
The login page informs you about the Unit name and IP address of the M!DGE3 unit you are trying to log in.
The login page allows to view and copy the password.
Web interface is designed for usage on all kinds of equipment – with different screen sizes and screen resolutions. Most of the pictures depicted in this User manual are taken on the desktop type of screen resolution.
Note A mechanism against brute-force attack is implemented. When wrong combination of the Account / Password is entered you have to wait a while for the following attempt. The time is growing with every wrong attempt.
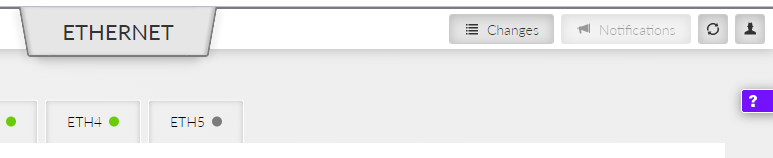
- Web page header

The header of each web page contains:
Unit name
IP address of the M!DGE3 unit you are connected to
Remote access button
Identification of the current web page (2nd or 3rd level of the menu)
Changes to commit button
Notifications button
Refresh settings button
User menu button
Supported web browsers for desktop are current versions of:
Edge
Chrome
Firefox
Safari
Supported Web browsers for mobile equipment are current versions of:
Safari for iOS
Chrome for Android
| Note | |
|---|---|
For safety reasons, it is recommended to use a web browser without any extensions (especially extensions, which could get access to data). |
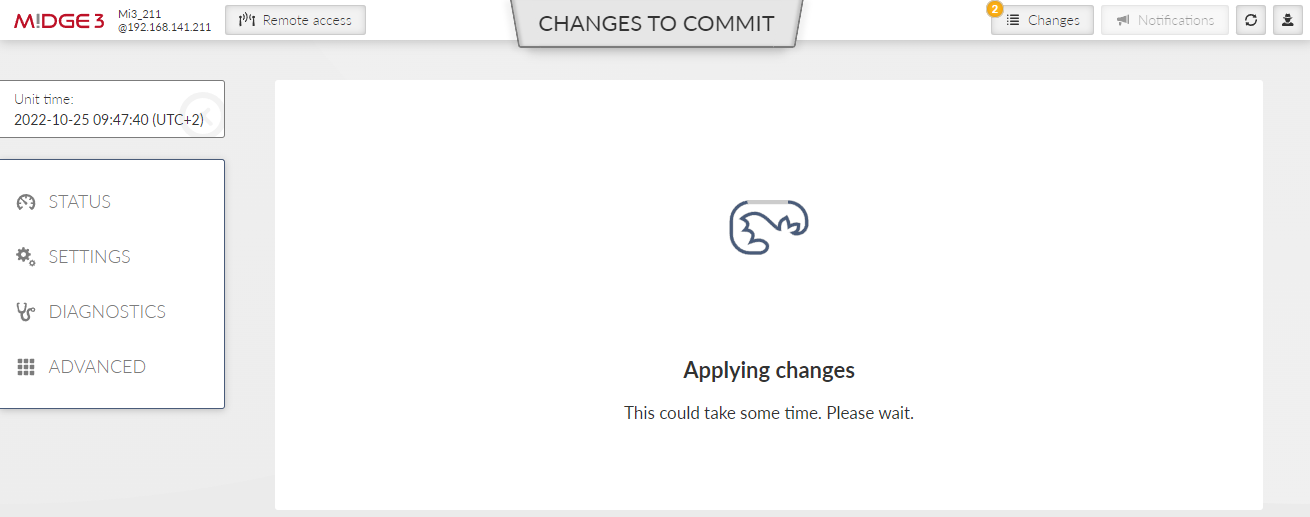
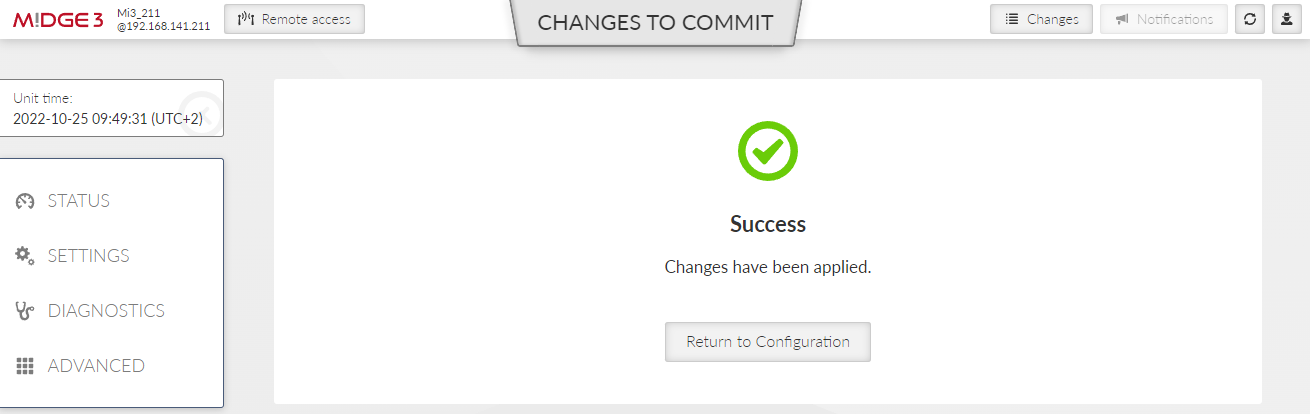
M!DGE3 is capable of remembering changes, which were done in its configuration and collecting them in a Changes to commit “basket”. All changes of configuration parameters are highlighted by different color.
To access the Changes to commit “basket”, click on the Changes button (top right corner in the Web page header) or use “Ctrl+Alt+C” shortcut.
Changes to commit “basket” collects all changed settings, which:
Are separated in the menu alphabetically. Alphabetical separation is sorted hierarchically according to the name of items in the menu.
Are displayed in the menu (including the path of their placement) and provided with a link for a quick transfer to its original placement.
Carry an information about their changed values (“Old value” → “New value”).
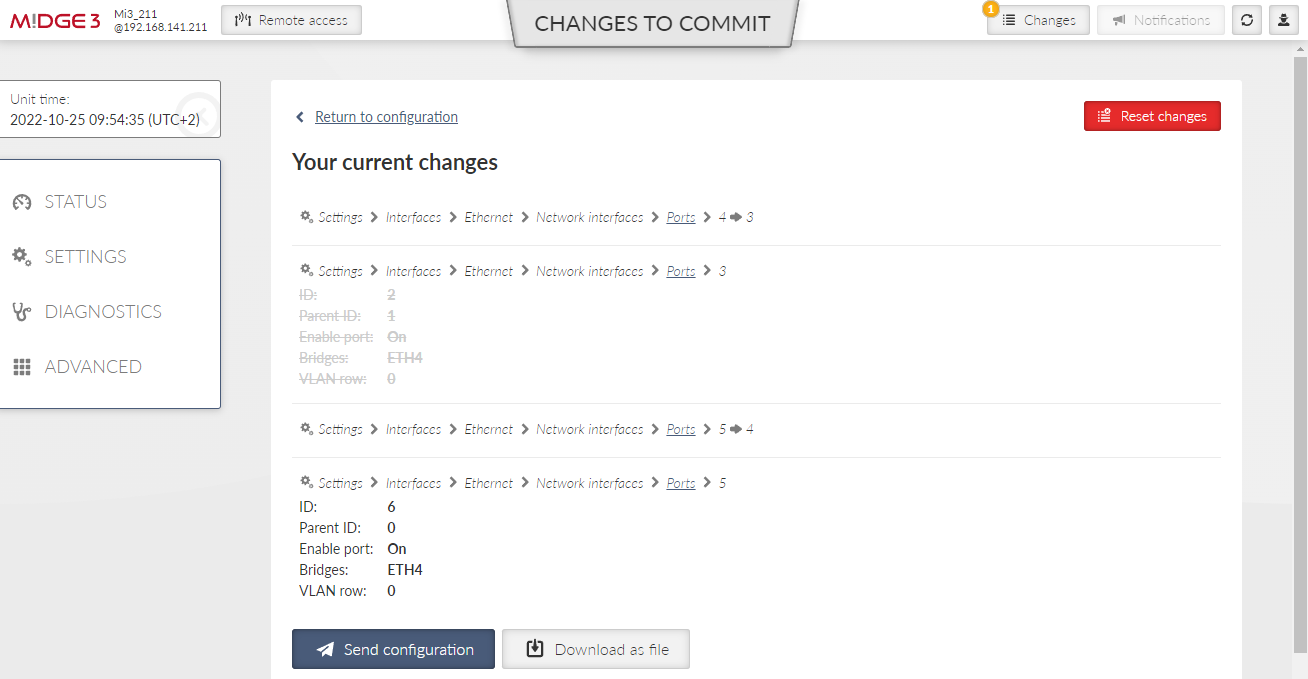
From this page, it is possible to:
Return to configuration – return to the last changed value’s configuration menu.
Reset changes – all changes will be reset back to their previously set value (not default).
Send configuration – Apply (Save to the unit) all the changes.
With M!DGE3 new way of showing important system events to the user is introduced. It is called Notification Center and is used consistently throughout the interface. Notification Center is located on the top right corner of the interface. It exists in two forms: active notification display and full Notification Center. Both the active notification display and the full Notification Center are displayed either below the top header of the interface or in the right hand sidebar depending on the size of user’s display. The behavior is responsive so in case the user needs to make the browser window narrower, the notification center automatically changes place to use the most efficient location.
| Note | |
|---|---|
To access Notifications it is possible to use shortcut “Ctrl+Alt+N”. |
 |
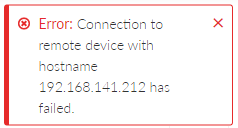 |
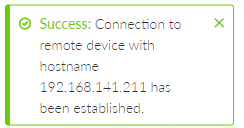
Notifications are mostly triggered by user actions in the interface, for example success or failure of Fast Remote Access connection. They are not to be confused with Events, which are triggered mostly by the system and are not shown in the Notification Center, but on Diagnostics > Events page. In other words Notifications are caused by the user, Events are caused by changing status of the unit.
Every new notification is displayed in the Notification Center drawer. User can either dismiss the notification by clicking the cross in the notification body, close all displayed notifications in the drawer or expand full Notification Center using buttons (“Close all” and “Show all”) on the right side of the Notification Center drawer.
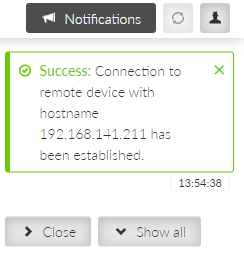
Notification Center collects all notifications that have not been dismissed and allows users to browse them.

M!DGE3 unit management is designed to work smoothly even when the unit under configuration is connected via relatively slow channel. In case of locally connected unit – direct configuration of the unit (accessing the unit IP address directly from the web browser) works fine. If the unit should be connected remotely via the network, the so-called “Remote access” needs to be used to configure and manage remote unit using bandwidth friendly volumes of transmitted data. Open the web browser, enter the IP address of a locally connected unit and connect to a remote unit (which needs to be accessible from the locally connected unit via the network).
| Note | |
|---|---|
To access Remote access it is possible to use shortcut “Ctrl+Alt+R”. |
M!DGE3 local unit must have the newest firmware version in the whole network to ensure proper Remote access functionality. Nevertheless it is recommended to keep the same version of firmware in the whole network. See details in chapter Firmware.
Remote access can be activated by clicking on the Connect access button.
Once the Remote access is successful, the IP address line changes its color to black together with the web page identification.
The IP address of the currently connected M!DGE3 unit is displayed as a part of the Remote access button. All the configuration settings are remotely available using standard web interface. Some of the Diagnostic features are available via local connection only.
Remote access connection can be established directly by entering the IP address of the
Remote unit as an additional parameter into the URL. The required format is:
https://LOCAL_UNIT_IP_ADDRESS?remoteAccessTarget=REMOTE_UNIT_IP_ADDRESS
for example: https://192.168.141.210?remoteAccessTarget=10.10.10.212
| Note | |
|---|---|
It is possible to use this URL format to make a web browser’s bookmark. Such bookmarks can be used for faster access to remote units. By default, remote access utilizes the _RO_Rmt_Access_Host_Key for establishing connections to remote units. However, for enhanced security purposes, we strongly recommend utilizing a custom RMTACCESS Key (menu SETTINGS > Security > Credentials). |
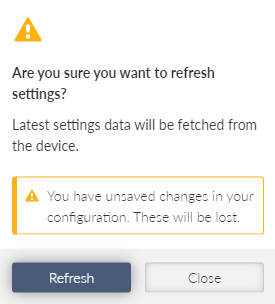
Refresh settings button (placed in the right corner of the web page header) triggers a feature which assures the user that he is working with current data.

Triggering the Refresh will upload current data from the unit to the web client.
| Note | |
|---|---|
Refresh deletes all non-saved changes which were done in the client. |
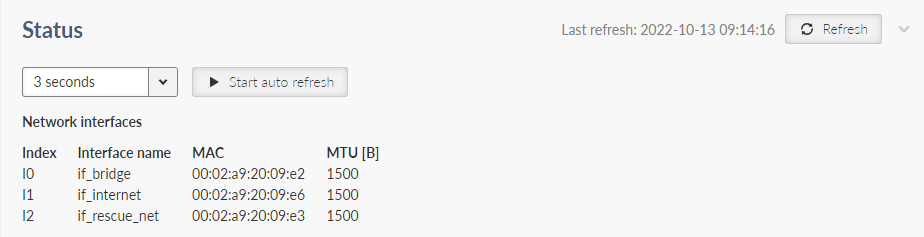
Status info area provides a general overview about M!DGE3’s individual SETTINGS (or DIAGNOSTICS) section by displaying diagnostic data relevant to the section. To update the data it is necessary to click the Refresh button. It is also possible to use auto refresh feature (Start auto refresh button), which automatically triggers Refresh after defined time period (3, 4, 5… 300 seconds).
This feature is available on individual web pages of the graphical user interface by clicking on the purple box with the question mark on the right upper corner (or in the middle) of the screen (according to the width of the screen).
The content of the help is identical with the respective sub-chapter of the User manual.