Now you have a working template, you need to define hosts (RAy2 stations). Each RAy2 station has its own IP address. The following steps will guide you through the Host Configuration.
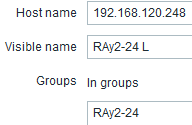
To create a host, go to Configuration → Hosts and click on the Create Host button. Define the Host name and its IP address.
Alternatively, you can define a Group for the hosts. Creating a Group is straightforward. You can create a new one while creating a host or you can do so by going to the Configuration → Groups tab and clicking on the Create Group button.
Linking a template to the host(s) is achieved under the same tab or you can open Template settings and link any desired host to it.
You have to set the IP address and the port number (161) for the SNMP interface. Otherwise, you won’t be able to use any SNMP item.
The option “Use bulk requests” can be enabled with RAy2 units. This feature enables sending multiple SNMP queries within one UDP datagram.

| Note | |
|---|---|
In this Host configuration menu, configure the Host Inventory to be filled in automatically. |

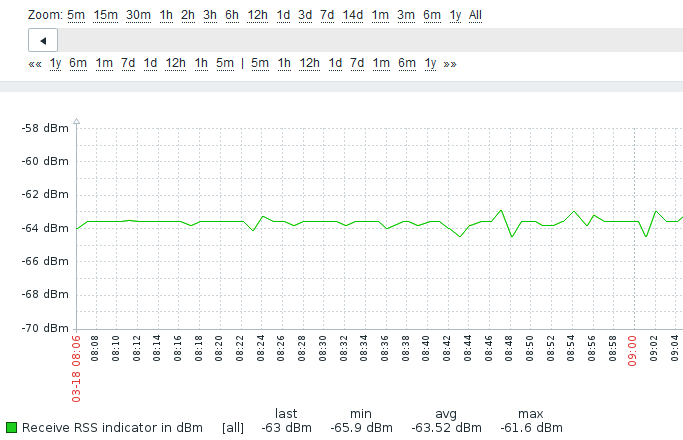
To check monitored values, go to the Monitoring → Latest data tab and choose the desired host from the Menu.
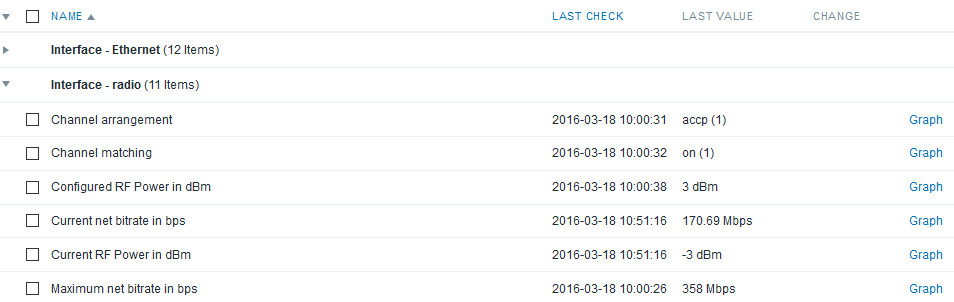
For each item, you can see a graph or a history table. If a trigger is configured for the item, the graph shows a line with a threshold value.