Zabbix can offer various ways of accessing the RAy2 web interface by clicking on the link within the Zabbix front-end.
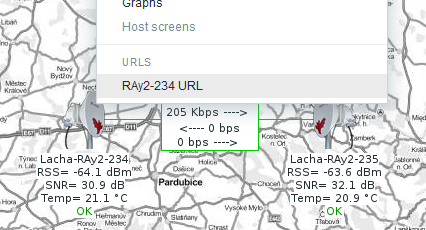
For every Host depicted in Maps, you can define its URL.

After clicking on the Host, a new Item appears (URL), defined with the Name and the actual link. And when you click on this URL, the RAy2 web interface appears.
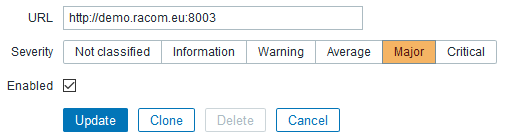
Every host can have as many Triggers as required. And for every Trigger, the respective URL can be defined. Just add the URL in the Trigger configuration page.
After you do so, every time the trigger is activated, you can click on the Issue description within Dashboard’s “Last 20 Issues” window and then on the URL link.
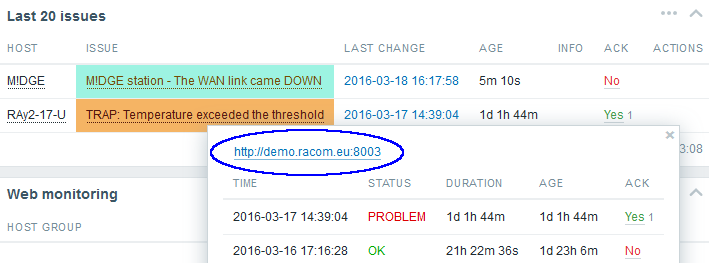
A simple click can forward you to the RAy2 web interface.
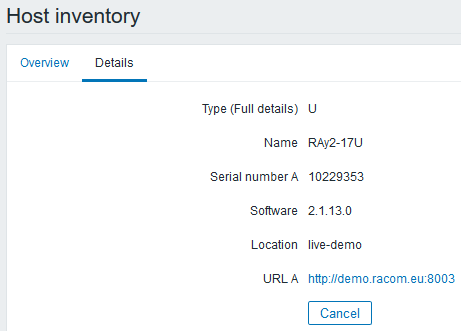
The third option is to use Inventory for configuring URL. For every Host, you can enable the Inventory (serial number, OS, host type, …). Within many Inventory options, the URL can be defined.
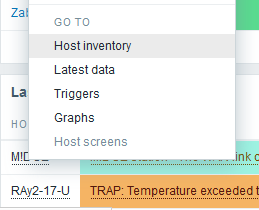
Every host’s Inventory can be opened from the Dashboard’s “Last 20 Issues” window. And in the Details, there is the configured URL displayed.