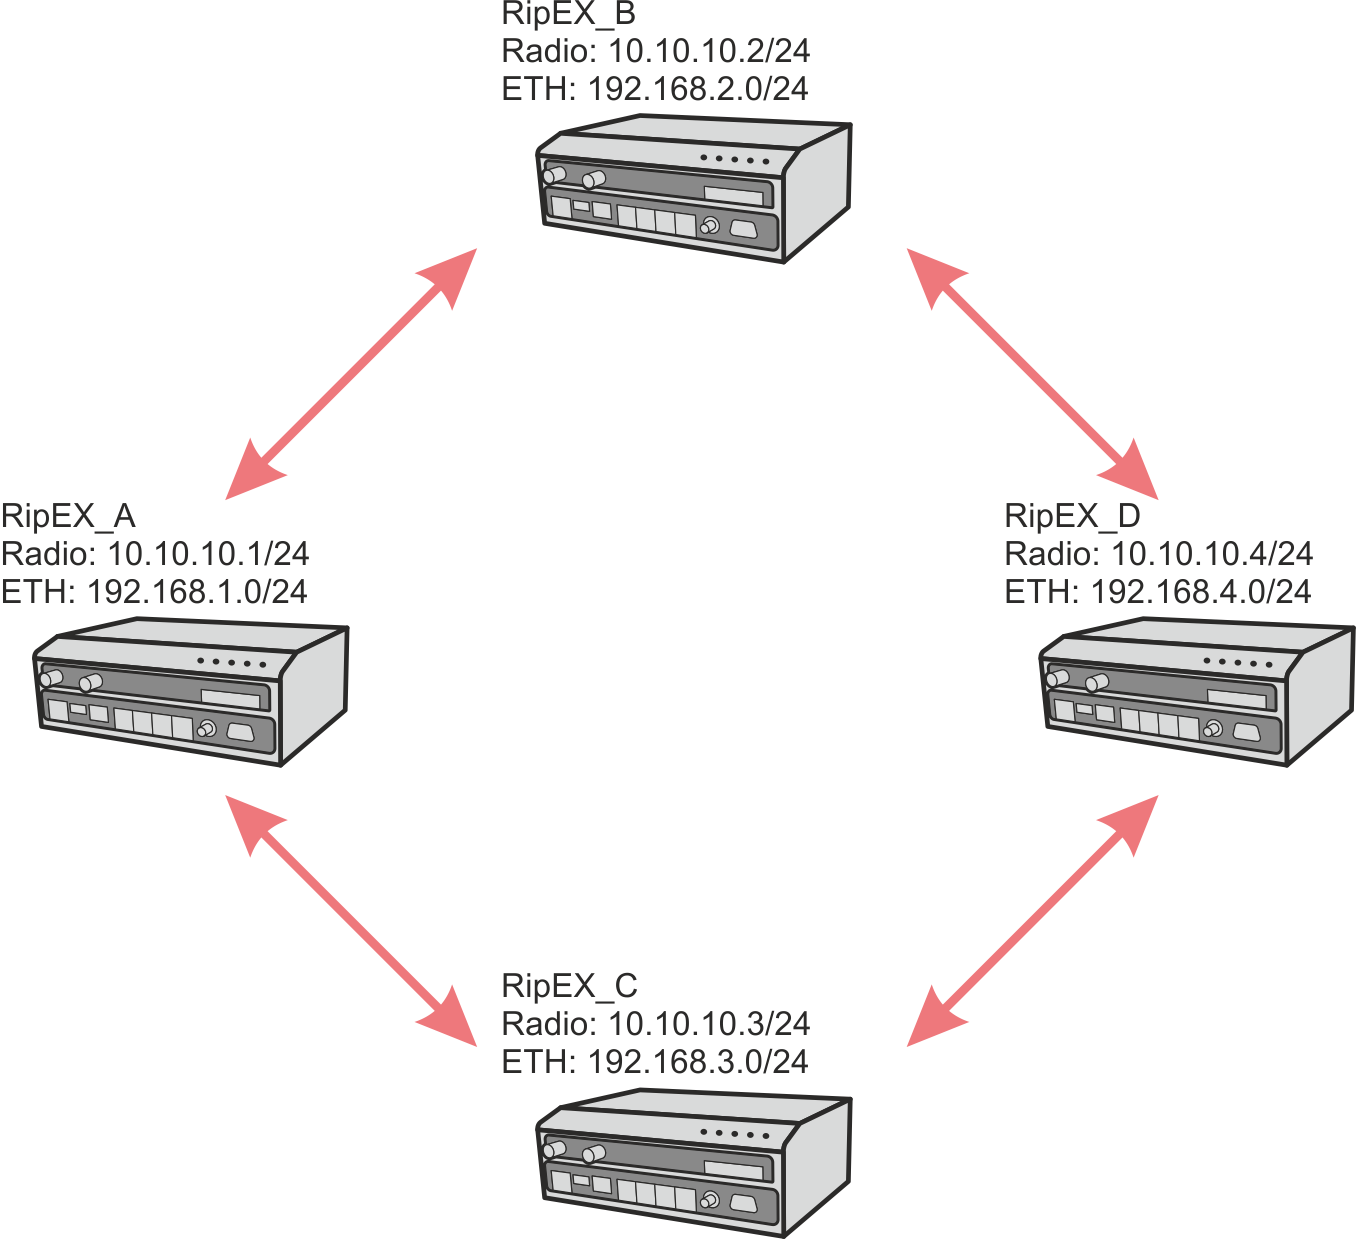
The third example is very similar to the first one, but the difference is that RipEX_A and RipEX_D can only communicate via repeaters and repeaters do not “see” each other. This is a typical situation in the field. For the test in an office, we use a frequency pair so that RipEX_A and RipEX_D send data on frequency 415.5 MHz and receive on 436 MHz, whereas RipEX units B and C have it vice versa.
Otherwise, the setup is completely the same.
If RipEX_A and RipEX_D are about to communicate only to each other, it might be useful to turn off “Routing offering”.
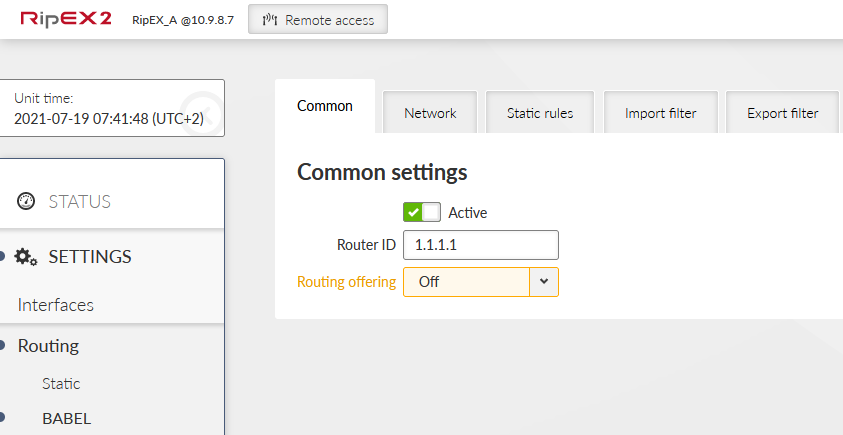
That would limit forwarding received routes from units A and D. Thus, RipEX_B and C will not be able to reach each other and there will be less Babel routes in all devices, you can compare it within this example. We will enable full routing so “Routing offering” will be “on” in all four units.
Change the frequencies in all units accordingly. Antenna configuration can be set to Single or Dual, it does not change the behaviour, neither performance while testing with dummy loads on your desk.
RipEX_A, RipEX_D
TX: 415.500.000 MHz
RX: 436.000.000 MHz
RipEX_B, RipEX_C
TX: 436.000.000 MHz
RX: 415.500.000 MHz
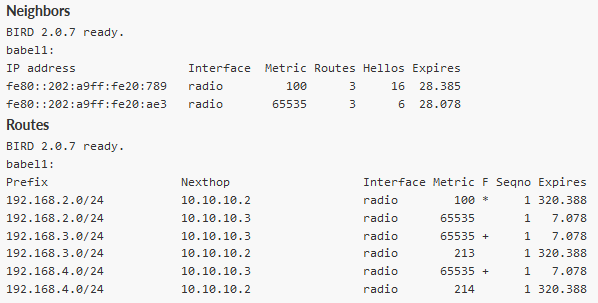
Check the Routing in Diagnostics menu. All three routes should be accessible via both repeaters 10.10.10.2 and 10.10.10.3 with the same price. One route is selected to be used; another one is a failure (candidate) option.
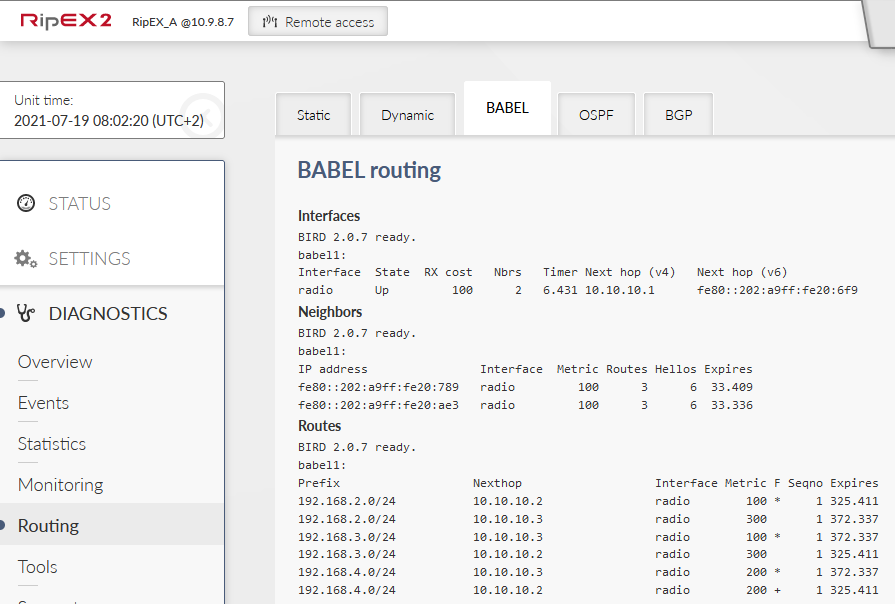
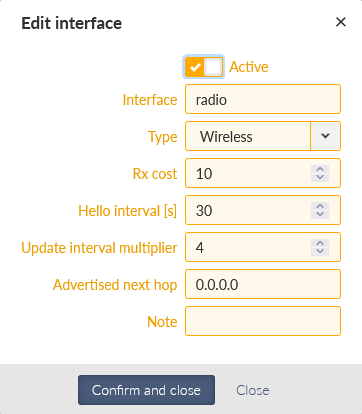
If you want to prioritize one of the repeaters, you can do it by decreasing the cost in this repeater. E.g., decrease it to 10 and check the routing again.

As you can see, route to 192.168.3.0/24 has a metric “10” now. Also, a route to 192.168.4.0/24 is 124, it could be 110, but some Hello packets were lost and it is increased for a while. Original values were 100 and 200.
And of course, Nexthop gateway is set to 10.10.10.3 for both routes.
Now, start a ping from RipEX_A to RipEX_D. Set a count to 1000.
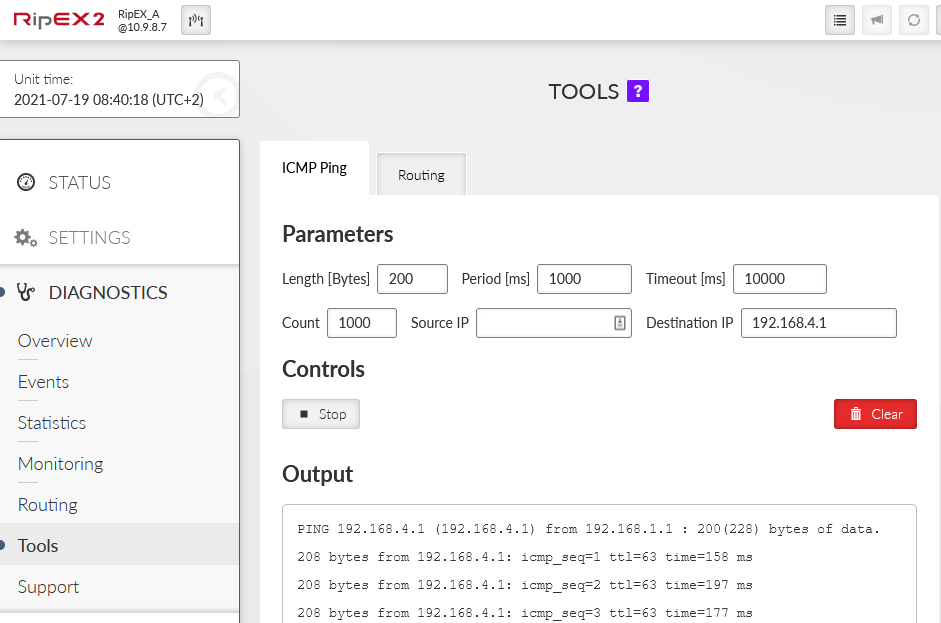
In another browser panel/window, open RipEX_A GUI again and check the Routing diagnostics. You can keep clicking on the “Refresh” button to see current data.
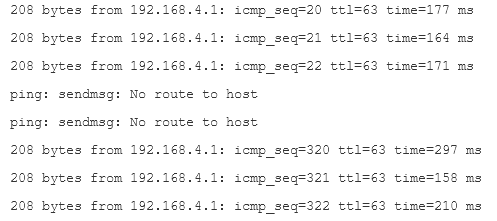
Turn off RipEX_C (currently used RipEX as a repeater for traffic). You will stop seeing successful pings, but after some time, you should start seeing correct replies (via RipEX_B). You should also see metrics being increased in the Routing diagnostics menu.
Note that even working routes can have higher metric due to propagating forwarded routes from “end devices”. If you had disabled RipEX_A and RipEX_D “routing offering” option, metrics would be more stable.
The last option is to use a tool called “RSS ping” (since RipEX2 firmware 2.0.5.0). RSS ping is a diagnostic tool for the radio performance measurement (RSS and MSE) of the individual radio hops within a RipEX2 network. RSS ping sends UDP data on port 8906. You should see changes in used repeater on the end to end communication path.
As you can see, it took 5 minutes to Babel to increase the metric high enough so the backup repeater is used. It is mainly due to low metric “10” of RipEX_C setup. If you change it to 50, it will be quicker (its metric goes up faster).
Turn on RipEX_C again and check the Routing again. Note you can also check Monitoring menu for live traffic monitoring.
One another option where to check how this works are Statistics. You should see some ICMP data being sent to 10.10.10.3 and some to 10.10.10.2. And there should be more Tx than Rx data for RipEX_C (10.10.10.3), because it was turned off for a while.
