The fourth example requires you to have an additional one simple switch and two Ethernet cables. Interconnect RipEX_A and RipEX_B via switch – plug the cable into their ETH4 ports.
| Note | |
|---|---|
It is also possible to interconnect RipEX2 devices directly with a cable only. External switch is not mandatory. |
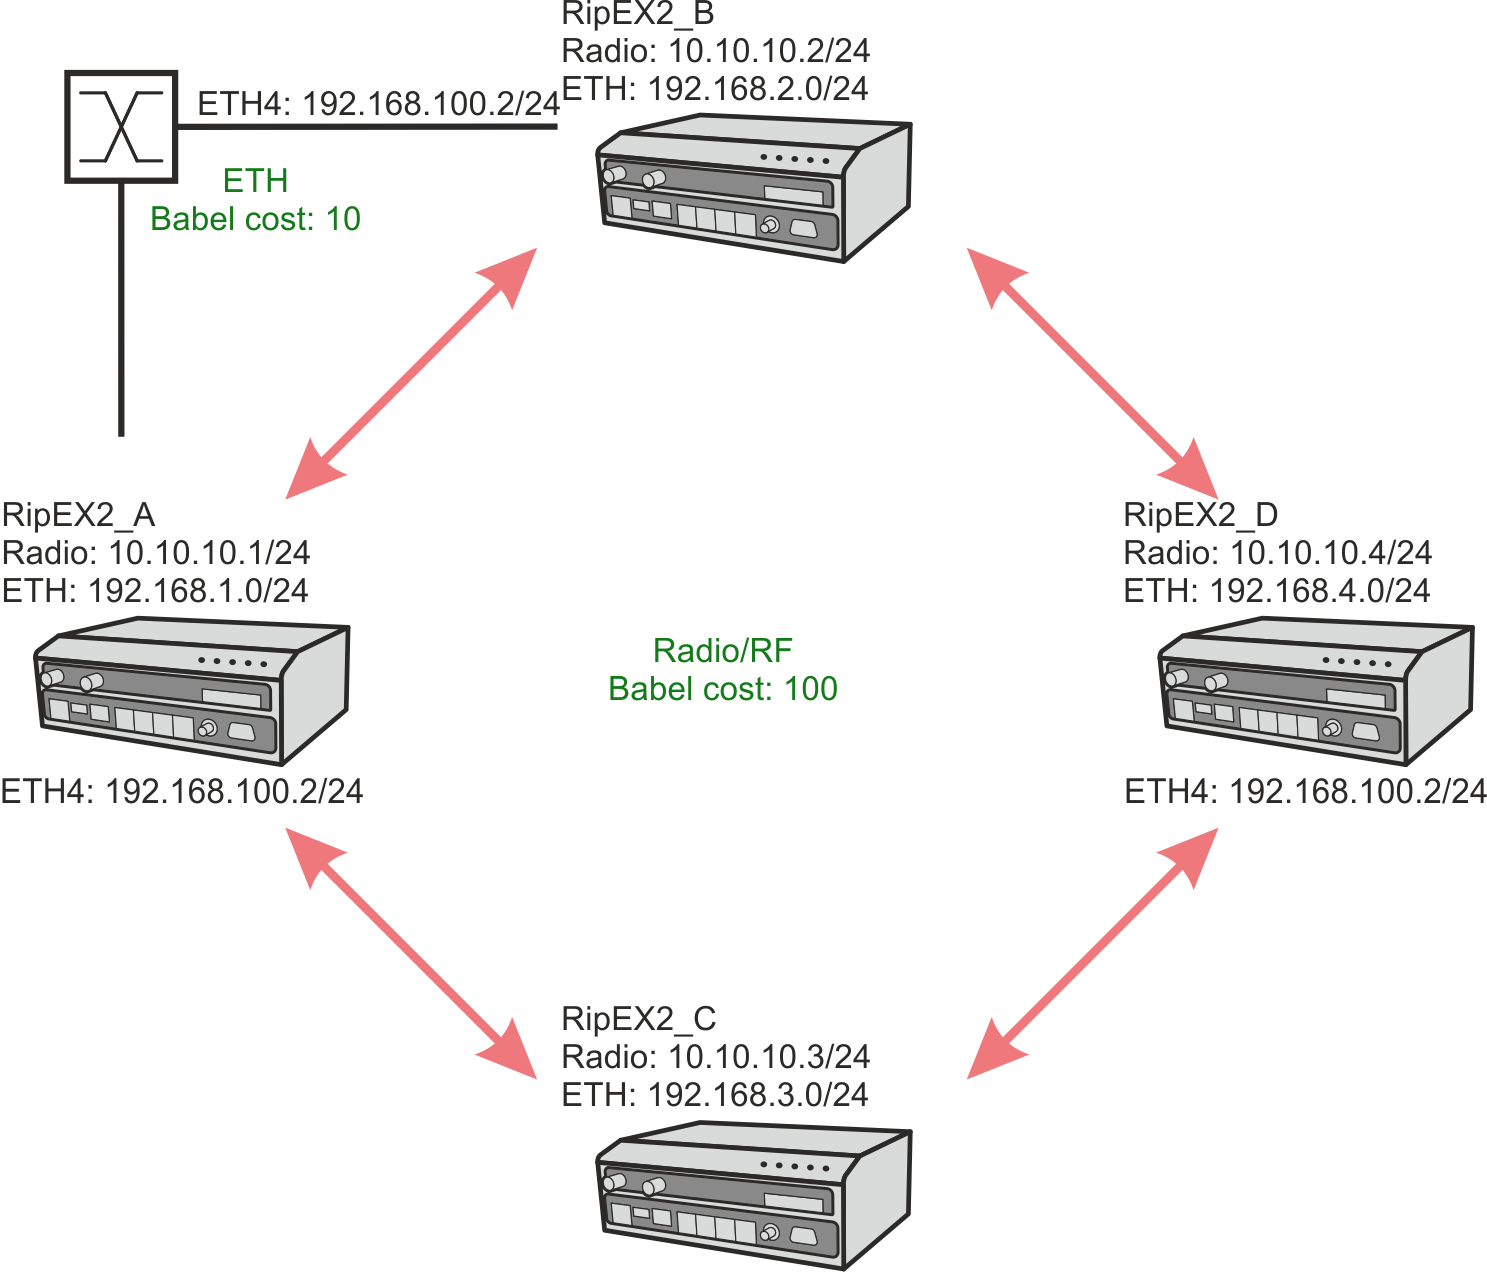
Radio/RF channel cost stay the same for all units, set to 100. The Ethernet path is on 100 Mbps link and Babel setup will utilize a low cost equal to 10 for this link and a faster Babel routes propagation, because the RF channel capacity is not an issue on Ethernet.
This example can show you how to utilize Babel if you have RipEX2 units connected to some fast “backbone” and would like to use RipEX2 link only as a backup; or to route particular radio segment via particular part of the backbone.
| Note | |
|---|---|
As depicted, example 3 utilizes dual frequency solution from example 2. |
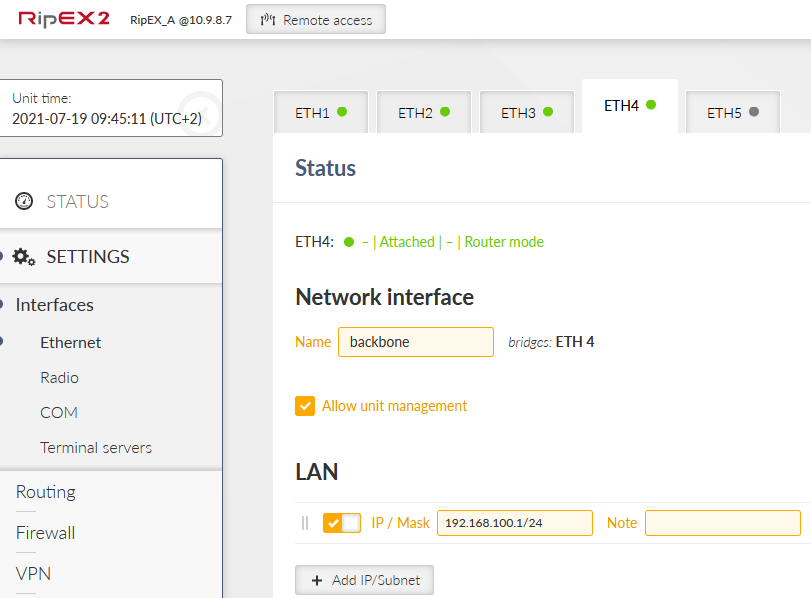
Start with ETH4 configuration. Go to the SETTINGS – Interfaces – Ethernet menu. Select ETH4 panel and detach it from a current bridge. Create a new interface called “backbone” and assign 192.168.100.1/24 IP address to it.
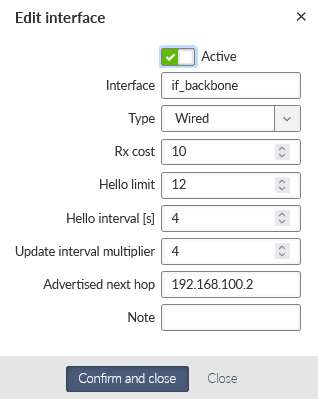
The last menu is SETTINGS – Routing – Babel. Within the “Network” tab, add a new interface.
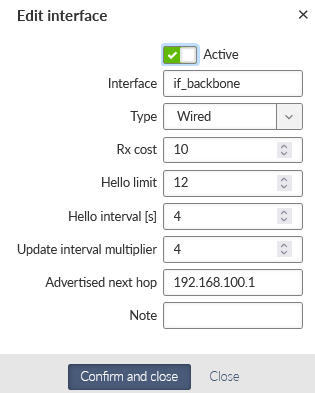
Non-default parameters:
Interface | if_backbone |
Type | Wired (Ethernet is used, not the RF channel) |
Rx cost | 10 |
Advertised next hop | 192.168.100.1 (our ETH4 IP address) |
Save the current configuration.
A very similar setup is to be done in RipEX_B as well. Set the ETH4 IP address in a new “backbone” bridge to 192.168.100.2/24.
| Note | |
|---|---|
You can optimize IP usage with /30 mask for “backbone” interface for our example. |

Create a new Babel Network interface.
Save the changes.
| Important | |
|---|---|
Do not forget to increase the Cost in RipEX_C (192.168.3.1) back to 100 for the radio interface. |
The configuration should be complete, there is no need to change other settings neither in RipEX_C, nor RipEX_D.
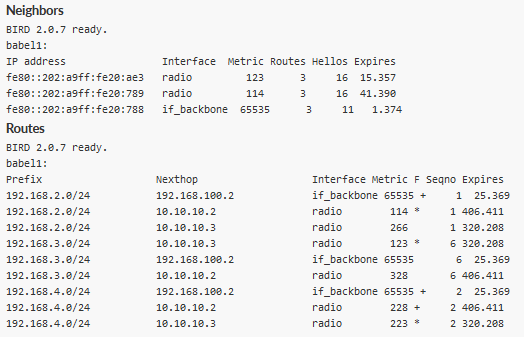
Babel Routing in RipEX_A state can be similar to:
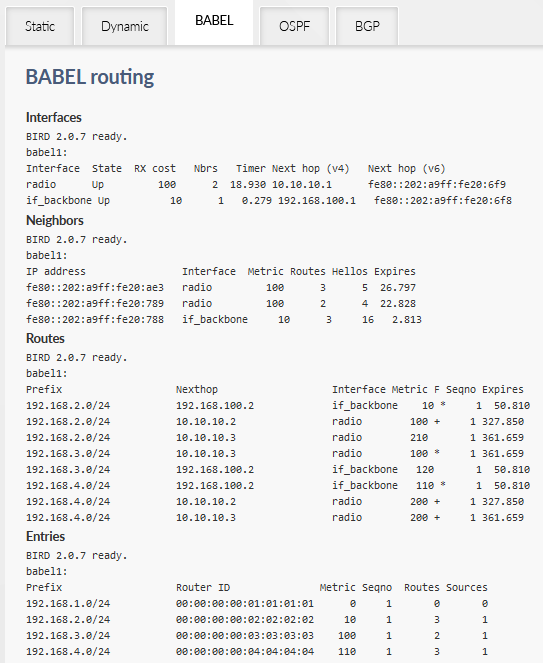
Our radio can “see” neighbor on two interfaces, with cost of 10 and 100 and it has three neighbors in total (two neighbors are of RipEX_B).
To each remote subnet, we have three routes. The best one to 192.168.2.0/24 is, of course, via ETH with metric equal to just 10. We can get to 192.168.3.0/24 via one radio hop – metric is 100. And the last 192.168.4.0/24 subnet is accessible with metric equal to 110 (one hop ETH and one radio).
The last table shows four entries in Babel table – the first one is our RipEX_A and then, three neighboring units with particular Metric/cost.
As a test, you can (this time) run an ICMP ping test from your laptop connected via ETH1, ETH2 or ETH3 to RipEX_A. Ping a remote 192.168.4.1 RipEX2 ETH IP address. Do not forget to set a default route to 192.168.1.1 or set a static route to 192.168.4.0/24 via 192.168.1.1 on your laptop.
Your laptop should have any other IP address within 192.168.1.0/24 subnet, except .0 (network, .1 RipEX2 and .255 broadcast).
A command and its output from Windows CMD line can be similar to:
C:\Windows\system32>ping 192.168.4.1 -t
Pinging 192.168.4.1 with 32 bytes of data:
Reply from 192.168.4.1: bytes=32 time=61ms TTL=62
Reply from 192.168.4.1: bytes=32 time=48ms TTL=62
Reply from 192.168.4.1: bytes=32 time=42ms TTL=62
Reply from 192.168.4.1: bytes=32 time=48ms TTL=62
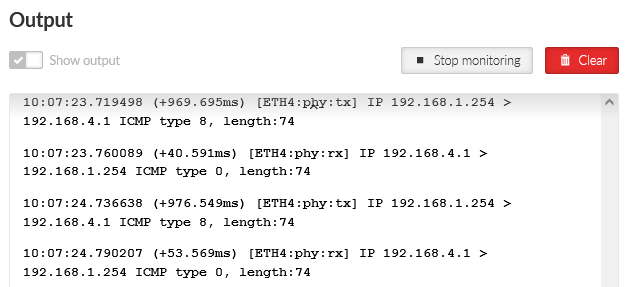
Verify that data are really sent via Ethernet. Run the Monitoring on ETH4 interface. Enable it, capture both Tx and Rx and limit the output to ICMP data only (All = “Off”, ICMP = “On”). Length can be 0 Bytes, because it is not important for us now. You should see similar ICMP output:
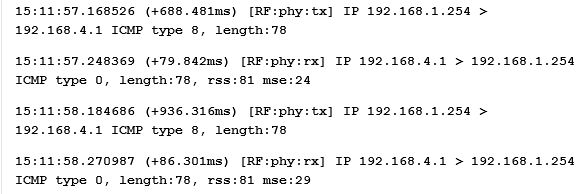
At the same time, enable monitoring on the Radio interface as well. Limit the output to ICMP data only (All = “Off”, ICMP = “On”). There should not be any data now. Unplug the ETH cable from RipEX_A or RipEX_B (the one attached to the switch) and check if data start going through the Radio interface.
Possible Babel routing while an Ethernet cable is disconnected:
If not completely gone, metric for GRE/ETH routes is quickly 65535 and thus, one of the Radio paths is used.
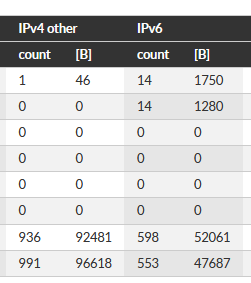
In the ETH4 Statistics, you should see a lot of IPv6 (Babel) traffic.