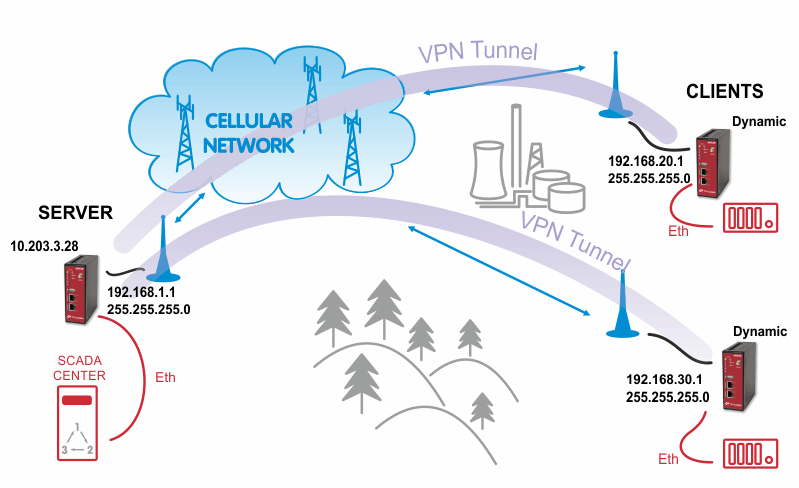
The OpenVPN tunnel can be operated in two modes – either in the Routed mode or in the Bridged mode. If the VPN network consists of one subnet only, the bridged mode should be used. The whole network seems to be just bridged within the local switches. If you need to interconnect several networks/subnets, you need to utilize the Routed mode. See the detailed examples below.
The first step is configuring the Server. Make sure you are connected to the cellular network and so you have the WAN interface active.
| Note | |
|---|---|
You can also use the Ethernet interface as a WAN interface. |
With OpenVPN, it is required to have a correct time. One possibility is to set the NTP server synchronization. Go to the SYSTEM – Time & Region menu and configure the unit with a reachable NTP server.
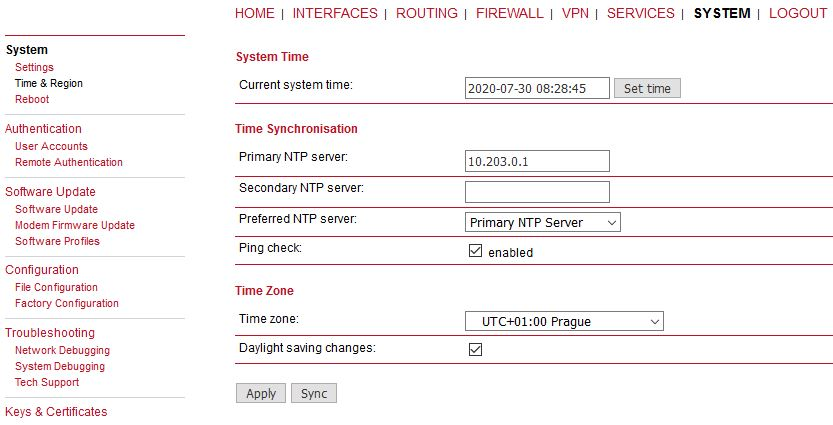
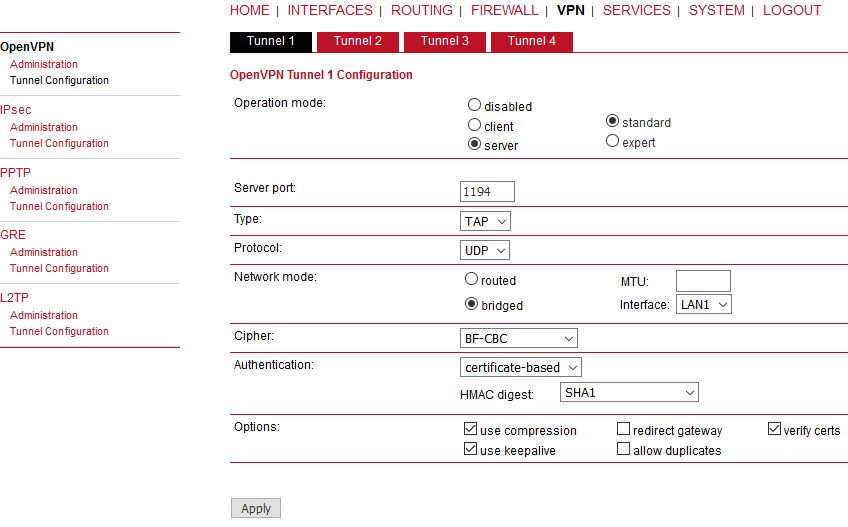
When you are successfully connected and the time is correct, start configuring the OpenVPN server. The default values can be used or read the manual for parameter descriptions.
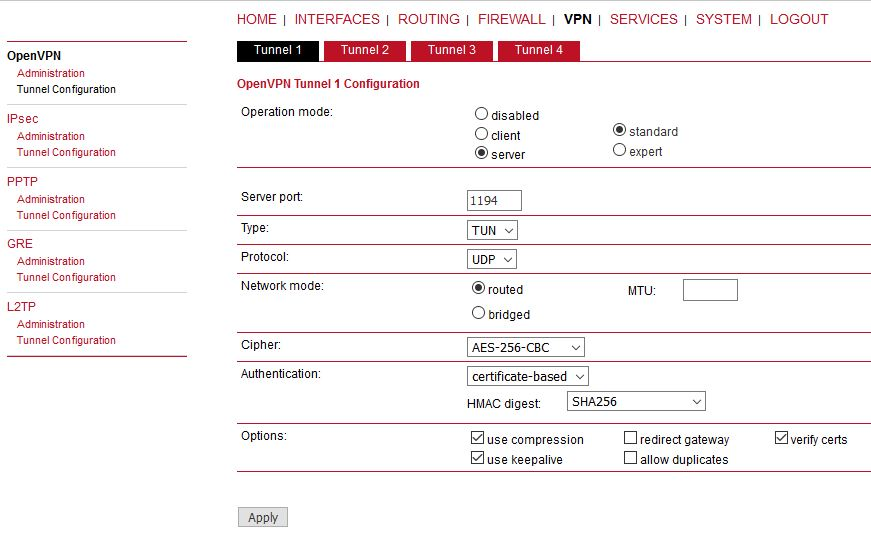
After applying the configuration, the certificates need to be created. Click on the given link or go to the SYSTEM – Keys & Certificates menu.

In this menu, create the certificates. By default, the Action is set to “generate locally”, but you can also upload the certificates or enroll them via SCEP.

| Important | |
|---|---|
The Passphrase must be configured first in the SYSTEM – Keys & Certificates – Configuration menu. The Certificates can be configured to contain specific Organization, Country, e-mail, etc. |
See the following example where the certificates are created.

In the same menu, you can generate or upload certificates for individual clients or go back to the OpenVPN – Client Management menu, configure required hosts and the certificates will be locally created automatically after downloading the Expert mode file.
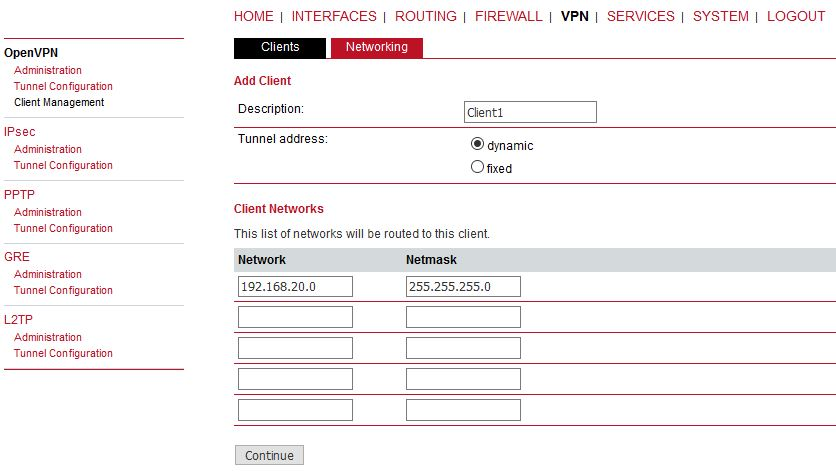
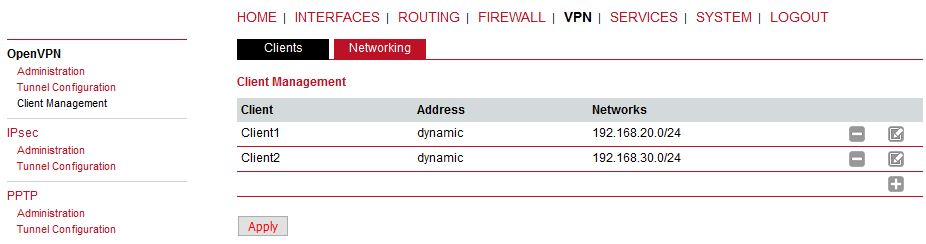
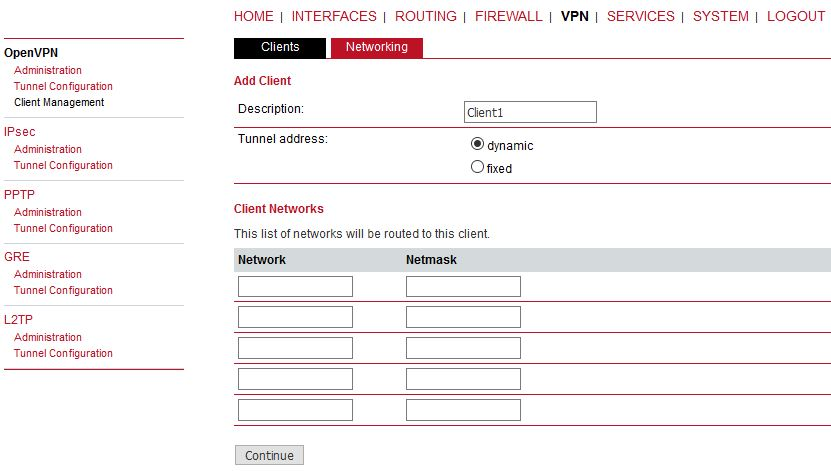
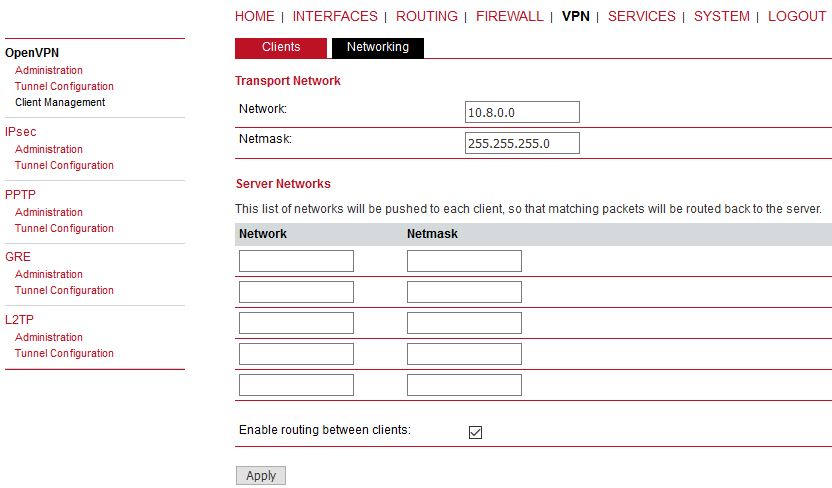
In the Clients menu, you can define the clients’ networks or leave it empty. Each client can have its own network/mask. In our example, configure the network 192.168.20.0/24 for midge1 and 192.168.30.0/24 for midge2. The tunnel address can be dynamic.
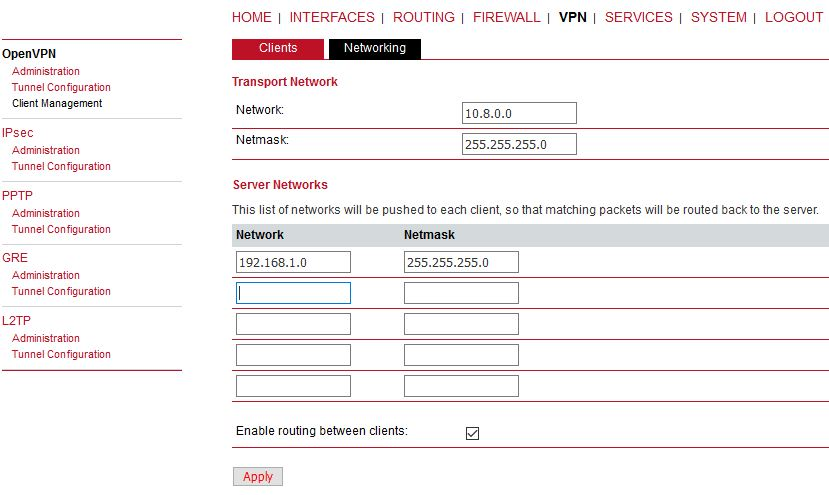
In the Networking menu, you can add networks which will be pushed into all clients’ Routing menu so that matching packets will be routed back to the server. Routing between the clients can be enabled too. Fill in the Server’s IP subnet 192.168.1.0/24.
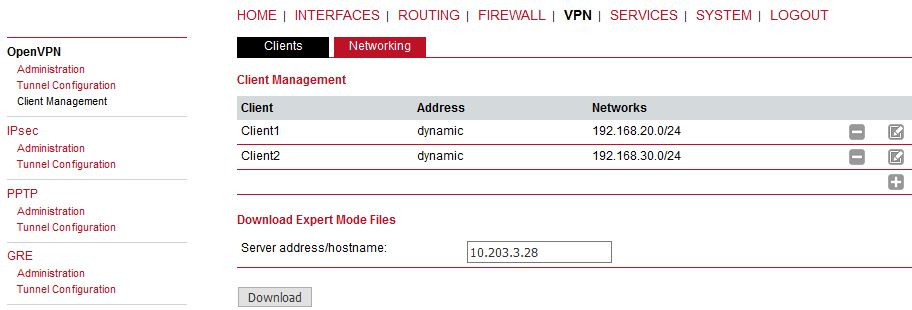
Another step is to download the Expert file for all the configured clients. Fill in the server’s WAN IP address.
| Note | |
|---|---|
The IP address depends on your APN configuration. If you use DynamicDNS service with a dynamic public IP address, fill the DNS hostname here and not a current IP address. |
The last step is Enabling the OpenVPN server.
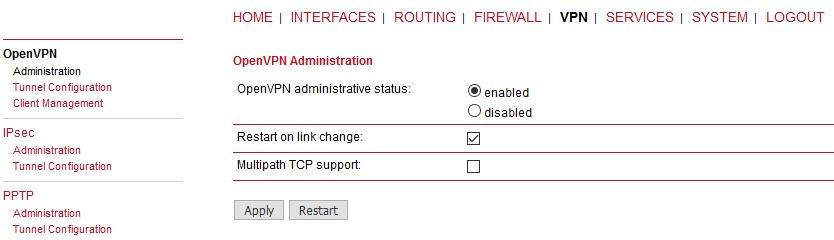
The OpenVPN server configuration is now complete. The server is running and listening for all VPN clients.
The easiest way how to configure the client is to upload the Expert file downloaded from the server. Unzip the file to obtain Expert files for individual clients.
Configure the APN on both clients and set the correct NTP server for time synchronization. Afterwards, go to the OpenVPN menu and upload the expert file.
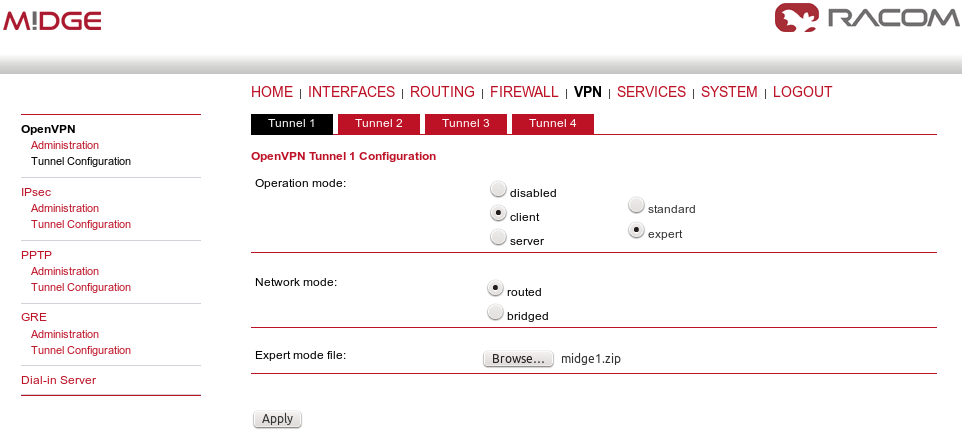
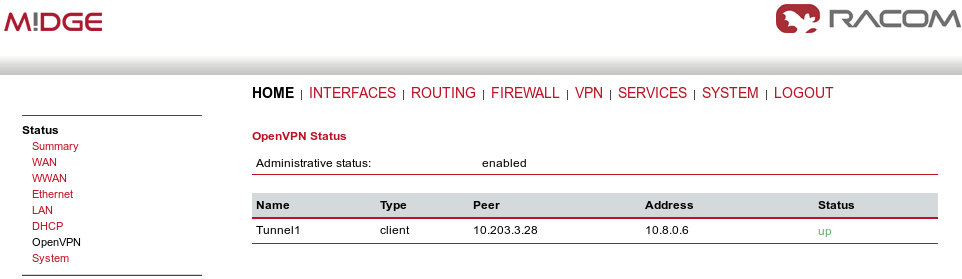
The Expert mode file should be installed. Now, enable the OpenVPN client and check the VPN status.
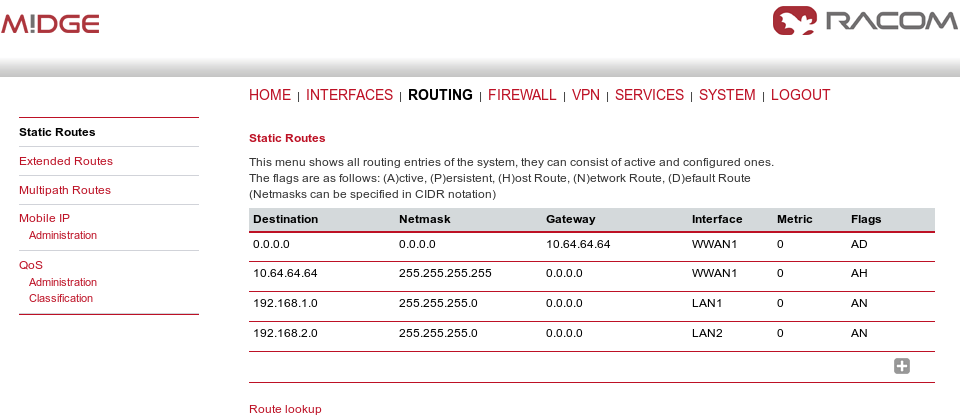
On both the client and the server, you should see the updated Routing menu. There is a new TUN interface. See the Server’s Routing menu.
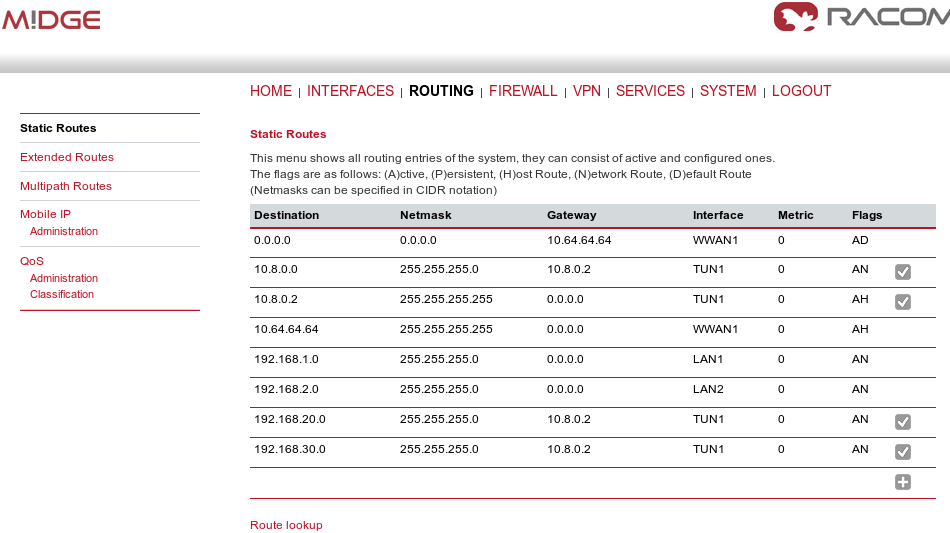
You can define new routes in the Routing menu manually, just choose the correct TUN interface. Note that adding routes this way is not possible with the Bridged tunnel type or with IPsec.
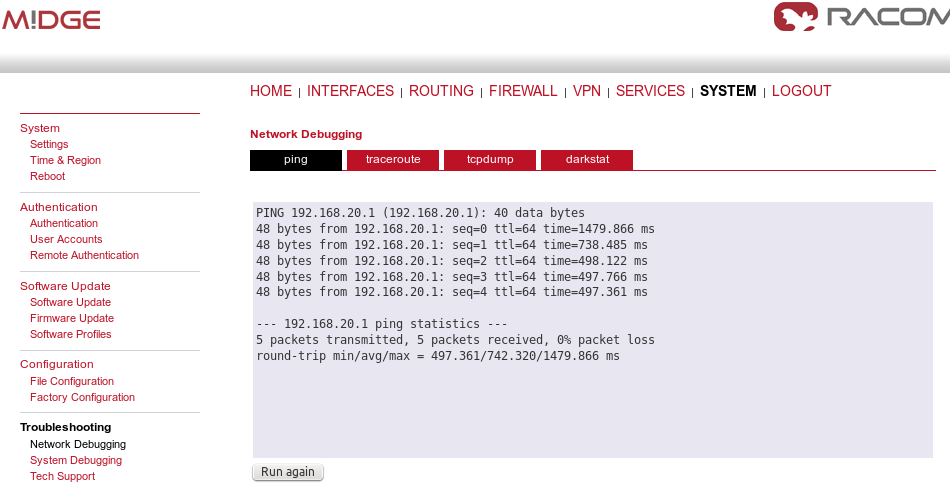
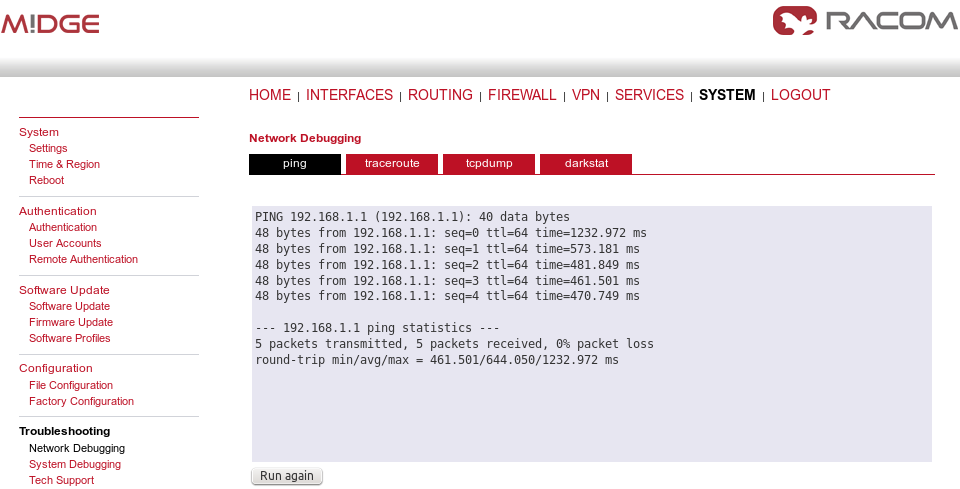
Check the reachability of remote network by issuing the PING command from the SYSTEM – Troubleshooting – Network Debugging menu. Ping the remote M!DGE Ethernet IP address or you can even try to ping a device behind the remote M!DGE. In the example below, a ping from the server to the client is displayed.

The Bridge type of the OpenVPN tunnel used when you need to interconnect the devices within one IP subnet so we create “transparent” network. In our example, we will use the 192.168.1.0/24 subnet. The center has the IP address 192.168.1.1. The clients have 192.168.1.2 and .1.3. You can attach any device (e.g. notebook) to any M!DGE so you can test the reachability of not just M!DGE units, but even the connected devices.
| Note | |
|---|---|
Make sure you have the correct IP addresses on all M!DGE units (INTERFACES – Ethernet – IP settings). |
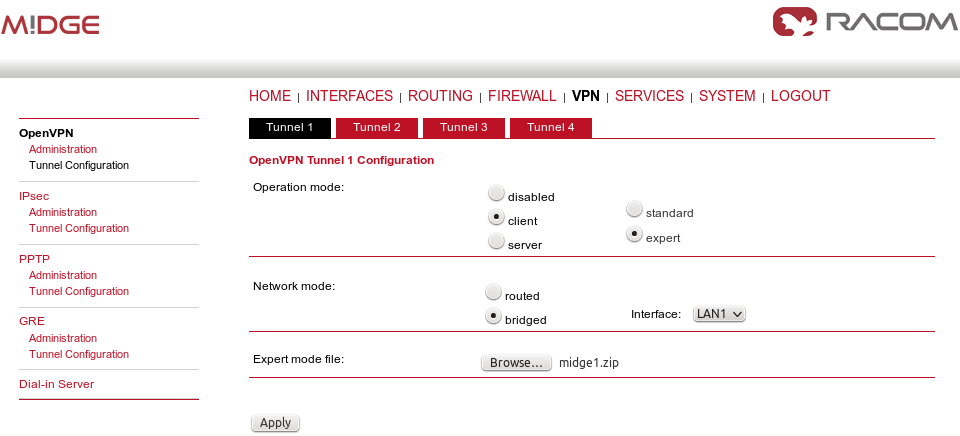
The configuration is very similar to the previous example. In the Tunnel configuration, set the Type to “TAP”, Network mode to “bridged” and select the correct LAN interface.
Create the required certificates and enable two clients in the Management menu. See the details in Section 1.1, “OpenVPN – Routed mode”.
The Networking and Routes menus do not require anything to change. We are NOT defining any routes in this mode.
Download the Expert file and Enable the tunnel.
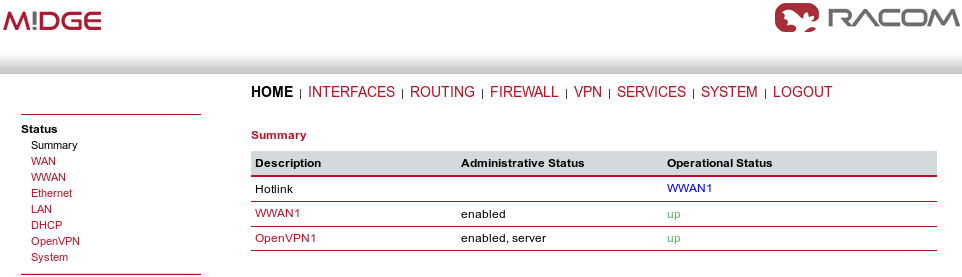
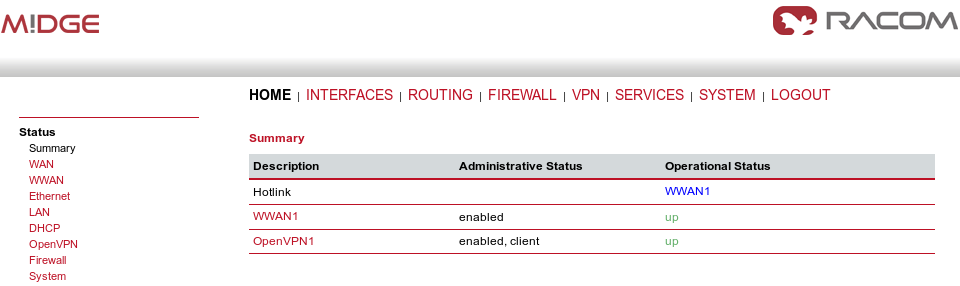
Finally, you check the OpenVPN status in the HOME menu.
The client’s configuration is very simple, just upload the Expert file.
| Note | |
|---|---|
You could, of course, use the Standard Operation mode, but using Expert file is simpler. |
Enable the tunnel and check the VPN status.
Test the tunnel using the Ping functionality.
Remember that there is no route in the Routing menu, because we are using TAP interface instead of TUN.
| Note | |
|---|---|
You can ping among the devices connected via M!DGE units. The link should be transparent and no extra routes are needed on the devices. |
$ ping -c 5 192.168.1.1
PING 192.168.1.1 (192.168.1.1) 56(84) bytes of data.
64 bytes from 192.168.1.1: icmp_seq=1 ttl=64 time=1636 ms
64 bytes from 192.168.1.1: icmp_seq=2 ttl=64 time=1327 ms
64 bytes from 192.168.1.1: icmp_seq=3 ttl=64 time=1477 ms
64 bytes from 192.168.1.1: icmp_seq=4 ttl=64 time=1207 ms
64 bytes from 192.168.1.1: icmp_seq=5 ttl=64 time=1097 ms

--- 192.168.1.1 ping statistics ---
5 packets transmitted, 5 received, 0% packet loss, time 3999ms
rtt min/avg/max/mdev = 1097.632/1349.279/1636.959/191.392 ms, pipe 2
OpenVPN is a very powerful tool. If you need to know more about the possible options, use the M!DGE/MG102i manual for more details.