Before starting to work with the HW please be sure that you have a SIM card enabled for data and you have all the necessary information from the mobile operator (PIN, APN, login, passwd)
Insert a SIM card into the SIM socket. If the router has two SIM card sockets, use the first one. Make sure the SIM is enabled for data transmission.
There are two reasons for installing the SIM card as the first task: a) the SIM card could be damaged when inserted into the powered equipment, b) the information from SIM card are read only after a power cycle.
Fit a GSM/UMTS antenna. For details see Section 4.6, “Accessories” or contact RACOM for suitable antennas.
Connect one M!DGE/MG102i Ethernet port to your computer using an Eth cat.5 cable.
Switch on your power supply. The status LED flashes for a few seconds and after 8 seconds it starts blinking to a green light. After approximately 30 seconds your router will have booted and will be ready; the Status LED remains shining.
When the Mobile Connection is enabled the Connect LED starts blinking while connecting to the GPRS/UMTS network – the color (green/orange/red) represents the signal strength (excellent, medium, weak).
You’ll find the description of the individual LED states in Section 4.3, “Indication LEDs”.
Please connect the Ethernet interfaces of your computer and MG102i.
If not yet enabled, please enable the Dynamic Host Configuration Protocol (DHCP) so that your computer can lease an IP address from MG102i. Wait a moment until your PC has received the parameters (IP address, subnet mask, default gateway, DNS server).
Alternative: Instead of using the DHCP, configure a static IP address on your PC (e.g.
192.168.1.10mask255.255.255.0) so that it is operating in the same subnet as the MG102i.The default IP addresses are:
192.168.1.1for Eth1192.168.1.1for Eth2192.168.1.1for Eth3192.168.1.1for Eth4192.168.5.1for Eth5
The default subnet mask is
255.255.255.0for all interfaces.Start a Web Browser on your PC. Type the MG102i IP address in the address bar:
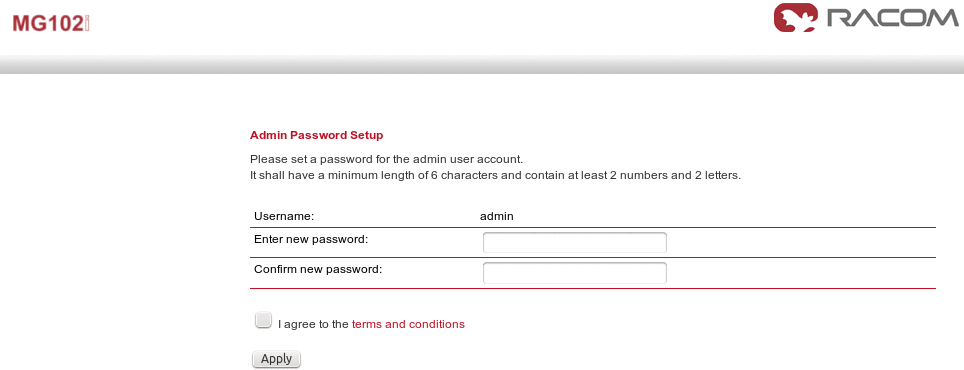
http://192.168.1.1Please set a password for the admin user account. Choose something that is both easy to remember and a strong password (such as one that contains numbers, letters and punctuation). The password shall have a minimum length of 6 characters. It shall contain a minimum of 2 numbers and 2 letters.

![[Note]](/images/radost/images/icons/note.png)
Note For security reasons, there is no default password.
Agree to the terms and conditions. The user is now obliged to accept our end user license agreement during the initial MG102i setup.
The M!DGE/MG102i Web Manager can always be reached via the Ethernet interface. After successful setup, Web Manager can also be accessed via the mobile interface. Any up to date web browser can be used. Any web browser supporting JavaScript can be used. By default, the IP address of the Ethernet interface is 192.168.1.1, the web server runs on port 80.
The minimum configuration steps include:
Defining the admin password
Entering the PIN code for the SIM card
Configuring the Access Point Name (APN)
Starting the mobile connection
| Note | |
|---|---|
Router (M!DGE or MG102i) can be safely turned off by unplugging the power supply. |