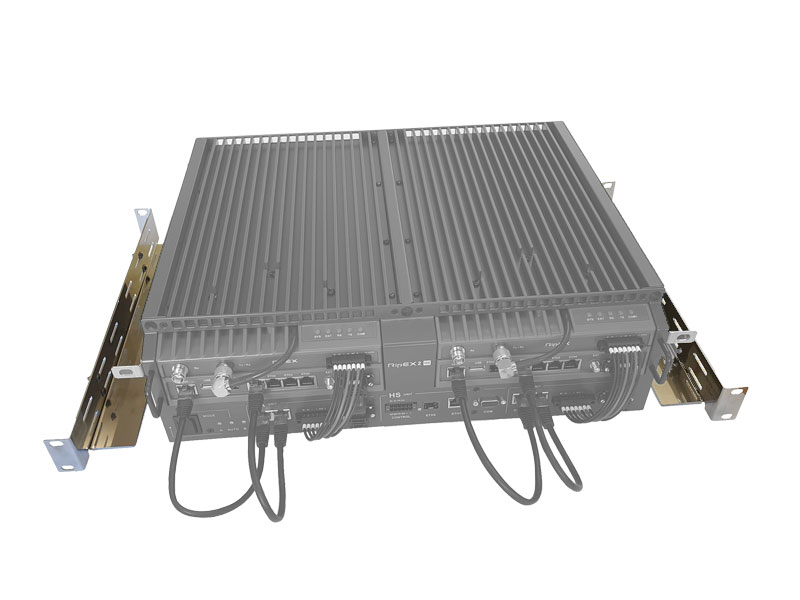
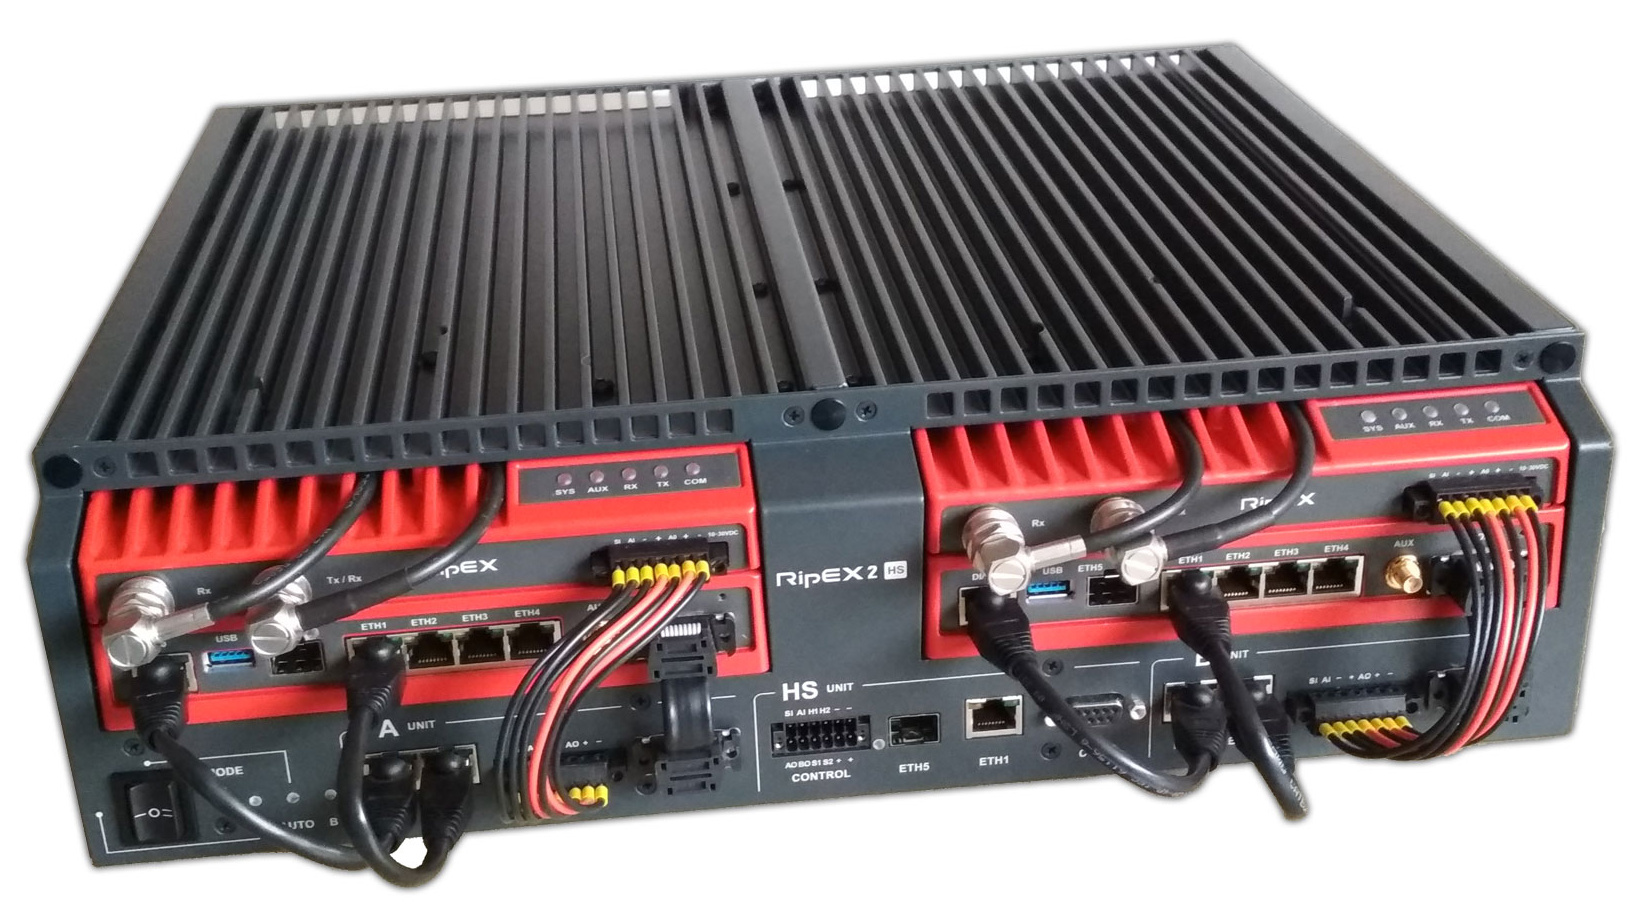
RipEX2-HS serves as a redundant station equipped with two standard RipEX2 radio modems using a hot standby functionality. All you have to do to put it into operation is to connect properly all connectors and configure internal RipEX2 units using a PC and a web browser.
To configure RipEX2 units please see RipEX2 Configuration
| Note | |
|---|---|
RipEX2 access defaults: IP 192.168.169.169/24, username: admin, password: admin or IP 10.9.8.7 when accessing over the optional USB/ETH adapter or Wifi adapter. |
Power on the RipEX2-HS and wait approx. for 25 seconds for the RipEX2 OS to boot. When accessing over the optional USB/ETH adapter or Wifi adapter, your PC will get its IP settings from the built-in DHCP server and you have to type https://10.9.8.7 in your browser.
When accessing over Ethernet, set a static IP 192.168.169.x/24 on your PC first, connect your PC to RipEX2 ETH interface, start your browser and type https://192.168.169.169 in the address line. When accessing RipEX2 for the first time and using https, you have to accept the https security certificate issued by RACOM.
| Note | |
|---|---|
Both RipEX2 units are in factory default settings. |
Use the HS chassis MODE selector button and set it to Unit A
Turn off Unit B (via power supply)
Configure Unit A:
Follow the common RipEX2 configuration
And follow the HS special steps further in Chapter 5, RipEX2-HS Settings
Download the Unit A configuration and turn this unit off
Turn on Unit B and use the HS chassis MODE selector button and set it to Unit B
Upload the previously saved configuration from Unit A to Unit B. Edit its configuration afterwards:
Rewrite station name (SETTINGS > Device > Unit)
Change the Chassis position to “Unit B” (SETTINGS > Services > Hot standby)
Change the management address within the SETTINGS > Interfaces > Ethernet menu (the IP address of Network Interface with the “Range for virtual address” checked)
Turn on Unit A
Use the HS chassis MODE selector button and set it to AUTO
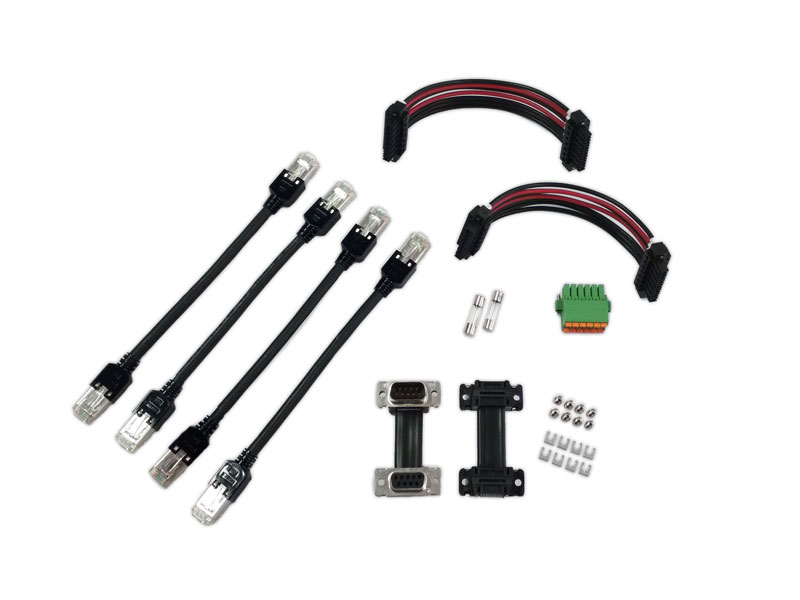
Interconnecting Ethernet cable (RipEX2 units – controller), 4 pcs
Interconnecting Power cable (RipEX2 units – controller), 2 pcs
Interconnecting COM cable + connector screws (RipEX2 units – controller), 2 pcs
Fuse (250V/2A), 2 pcs
DC Power and control connector plug (controller), 1 pc
Mounting kit (also supplied with RipEX2-RS and RipEX2-RD)
2× Adjustable rail (adjustable for 19″ Rack depths in range of 380 – 640 mm)
2× Locking L-holders
10× M6 screws + cage nuts